Showing posts with label Postage Frames. Show all posts

Friday, April 10, 2015

Mixed Media Canvas by Kim F

Good morning friends! Today I am sharing a fun mixed media canvas.  
This is a 4 x 6 canvas I had in my stash and I love the white, blue and black theme.
I started of with a coat of white gesso on the canvas and then used my sprays in coordinating colours.  I then cut several squares with my 2 inch punch and layered them on top of the paint and sprays.
 Next, I got out some stamps and did some stamping in the background. Once that was complete it was time to put on my chipboard pieces.  I layered on some fun pieces from other sets in Gina's store, that is what I love about her shape sets, they have pieces in them that you can use on various projects.
Below here you can see the stackable labels I painted and used my alpha stamp on and then used Gloss Accents over it. I love the high gloss on it.
Thanks so much for stopping by today!

Gina's Designs Items Used

Other Items Used
Recollections Embossing Powder
Tim Holtz Stamps
Darkroom Door Alpha Stamps
Lindy's Stamp Gang Sprays
Ranger Fine Black Embossing Powder
Paper Artsy Beach Hut Paint 
Prima Metal
Blue Roses & Lace from Kraftsupplies4U
Paper Blooms, Chain, Pearl Bling From My Stash

Friday, May 23, 2014

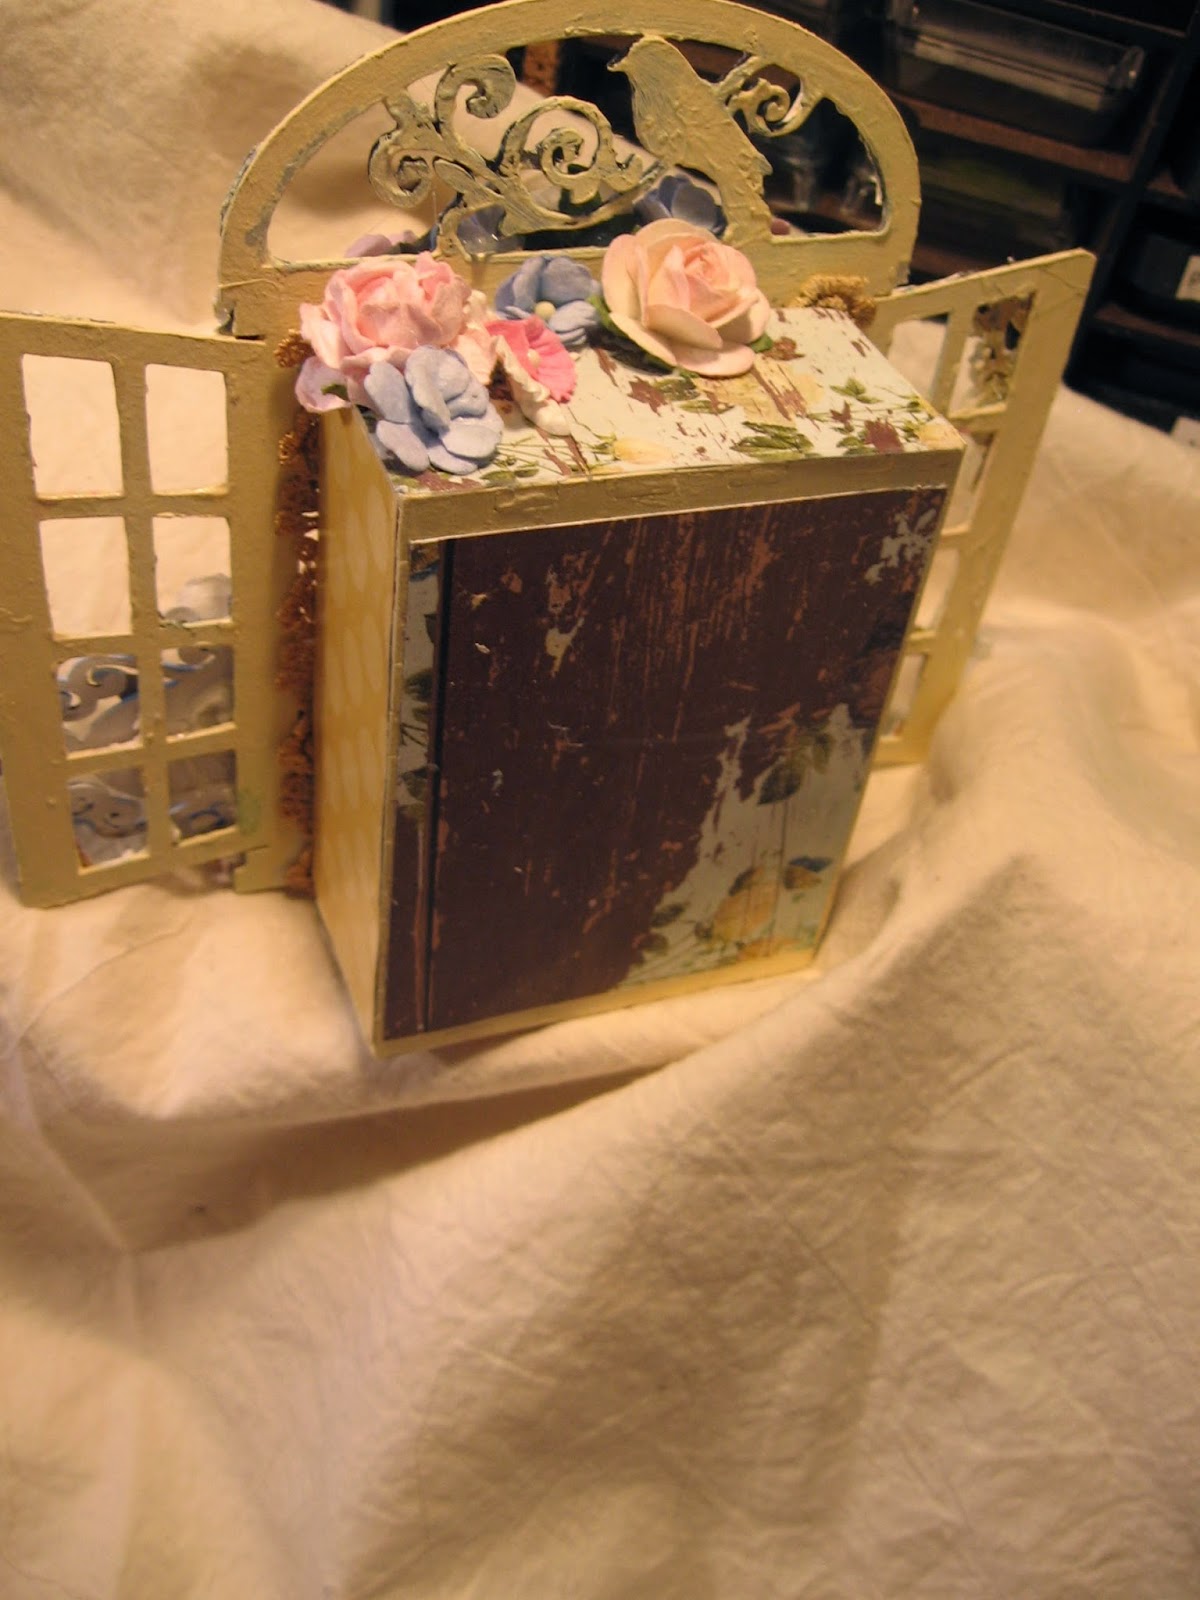
Shabby Cottage Window Shadowboxes


 Happy Friday everyone! Today I would like to share a fun little project I created to hang on my wall in my kitchen. These are my Shabby Cottage Window Shadowboxes, which are made from Gina's Bagatelle Boxes.

 I really love these little bagatelle boxes, they come in lots of different sizes, and you can purchase them in a set of 12! I had a lot of fun with these, and got out the Large Cottage Windows to place over the top of the boxes to create the illusion of looking in a cottage window. I did a lot of mixed media work on the windows, and it was fun to get my hands dirty!

You can see in the first one, several of Gina's other pieces, such as the postage stamp frames, gears, diamond texture sheet, stackable labels set, and a few pieces from the spring shape set as well. I embossed, painted and stamped on most of them and of course added some laces for a finishing touch.


Side & Back View of the Bagatelle Boxes


Thanks so much for stopping by to take a look at my shadowboxes and I hope you will give them a try!

Gina's Designs Products Used

Other Items Used
My Minds Eye Pretty Things Paper
Wild Orchid Craft Flowers
Americana Baby Blue, Buttermilk and Snow Paint
Stampendous Shabby White Embossing Powder
Lace From The Lace Mama
Shimmerz Texturez & Dazzlerz Paints
Wood Embellishements and Lace From My Stash
Wood Dressform by WhichCraft


Thursday, March 27, 2014

Craftsupplies1 Cross Promotional Projects and Wall Art by Mary M


This week we are featuring more amazing projects from the  Craftupplies1 Design Team!  The ladies on the team have really pulled out all the stops, and have come up with some creative ways to use our products. First up is Jennifer with a beautiful steampunk shadowbox along with a set of gorgeous cards as well.

Jennifer

Here is a link to Jennifer's video for her Shadowbox

Here are two gorgeous cards, also from Jennifer this week

 
 Here is the link to Jennifer's Card video
Next up is Kristina, who has created some really wonderful mini TP Tussie Mussies, just look at all this beauty!
Here is the link to Kristina's Video

This is another project by Kristina we wish to feature this week, it is her Paris Shadowbox, its just so shabby and beautiful!
Here is the link to Kristina's Shadowbox Video

Heather has made this very pretty and unique Altered Bottle, we just love it!

Here is the link to Heather's video

And last but not least we have Kim who has altered a Paper Mache Mailbox.

Here is the link to Kim's video

Thanks to everyone on the Craftsupplies1 team and please check out Julie's two shops on Etsy and Zibbet.


Next up is Mary with an inventive way to use our Love Wall Art Kit just by making a few simple adjustments.

Hi everyone. Mary here and today I have designed a "lace" sign from Gina's Designs LOVE wall art kit! I plan on using it in my craft room to mark my lace area. When I have decided were that area will be, I will then make the decision on how I will attach it. For now I will just stand it up accordian style!
I lined the back chipboard with paper from Prima's Delight after edging it with Walnut Stain.  The corrugated squares were lightly touched with gesso. For the letters, I took the "O" and cut a small section from it to make a "C".  After a coat of gesso and embossing with Madonna Robe Blue Gold, I turned the "V" upside down and attached the little piece left over to form the "A."
The cutouts are from the paper line. I use a croched doily from my stash under the "A" and one of Gina's Designs under the "E". 

 The panels were attached together with a lovely piece of lace from CraftSupplies1. I took out the ribbon that was woven through it. I then used one of my Tim Holtz Blending Tools and used it to drag the lace over the Antique Linen ink pad.
All the metal flowers are from CraftSupplies1.

For more information, please stop by my blog HERE!

Thanks for stopping by the blog today!!!

Gina's Designs Products

CraftSupplies1

Other Products
Paper: Prima - Delight
Embossing Powder: Lindy's Stamp Gang - Madonna Robe Blue Gold
Stampin' up! - Clear
Ink: Tim Holtz Distress Inks - Walnut Stain, Sage Green, Antique Linen and Pine Needles
Gesso: Studio 71 - white
Flower Buds and Leaves: Wild Orchid Crafts
Doily: Stash
Flat back Pearls and Bling: Stash
Butterflies with Bling: nail art.

Saturday, March 8, 2014

Altered Canvas in a garden theme by Nancy and Sketch Challenge Layout by Marfa

Hi everyone, we have two posts on the blog today.  First up is Nancy with an altered inverted canvas.  

Hi everybody, Nancy here!  Today I'm sharing one of my favorite themes again.  Nature!  Somehow for me, it's the theme that comes most easily, and gives me the most pleasure in creating.  I began with a simple application of gesso to the frame, then streaked it with some various colors of Folk Art acrylic paints.  When the paint was dry I added some Kroma Crackle.  This crackle product can take a couple of days to "cure" and finish crackling, so I just leave it and move on to other projects.  When it fully "cured", I rubbed on some Prima chalk inks in various colors to bring out the crackled finish.  I found a nature collage style of design paper in my stash that I'd picked up at Michael's, and I secured it to the back of the canvas with mod podge.  Now comes the fun part.  I began to gather my chippies and to ink, emboss and crackle them.  I looked through my "nature" stash and found nests, birds, eggs and mosses.  After that it only took an hour or so to decide on my final arrangement and to adhere the pieces to the canvas.


Gina's Designs Products Used:

Chipboard pieces have been colored with Prima Chalk Inks.  These are a great tool for coloring.  If you buy the big set you will have plenty of colors in the same family to use for shading.

Tree 3 ( a portion of the tree can be seen on the inside)
Topiary Trees (basic instructions are below the post on how I colored it)
Build-a-Layout Country Living (the wagon wheel) crackled with TH distress rock candy crackle paint
Ornate Corners (inner corner top right)
Fall Shape Set (the rake) colored with chalk ink then TH distrees embossing powder to look like rust

Coloring the Topiary:

I began with a light dry brushing of gesso followed by Prima Chalk Ink.  I "shaded" the pot by leaving the thinly coated white gesso uncolored in the center to give it a rounded look.  For the topiary, after I colored with shades of green chalk ink, I added some clear glass bead gel and left it to dry.  It will dry clear.  At that point you will have lots of texture from the beads that will be stuck to the chipboard.  I then rubbed on some Gilders Paste in Vertigris over the beads and along the edges.  Done!


Next up is Marfa,  who has followed our  March sketch challenge with a 12 x 12 layout titled "You'll Always Have My Heart".  Enter in our gallery for a chance at winning a $10 gift certificate for Gina's Designs online store.


Happy Saturday!!!  This is Crafting Marfa today.  I want to share a layout that I made recently.  I'm using a sketch by Gina's Designs.  The sketch is for this month's challenge,  So I invite you to check it out and participate!  These are vintage photos of my mom, my aunt and my uncle.  I matched the paper to my mom's shirt and my aunt's trousers.  I colored the chipboard with Gelly Roll pens and then with a glitter pen.  I followed the sketch and simply added a couple of tags, some die cuts and a few flowers.   This layout was very easy to put together.  The sketch is easy to follow.  I love the simplicity of this layout.  It is eye catching, but I didn't have to spend a whole day putting it together.  Scroll down for a list of supplies.


Gina's Designs Chipboard Supplies:


Other Supplies:

Paper by Lilybee Designs and Webster's Pages
Tags by Elle's Studio
Die Cuts by Lilybee Designs


Thursday, February 6, 2014

Art Journal cover by Angela and an organizer by Heidi

Today we have two unique and different projects to share.  First up is Angela with a peek at her new art journal.

Hi everyone, its Angela here and today I have the front of my Art Journal to show you. I have been taking part in a group on Facebook called Journal 52. Each week we get a prompt and make an art journal page using that prompt as inspiration. I have been thinking about art journaling for a wee while now and this kind of gave me a shove in the right direction.

 Gina's Designs oroducts used : 
Martha Stewart Paper clay
Prima Flowers
Vintage Taupe and Shabby Blue Frantage embossing enamel
Verdigris WOW embossing powder

For more details on how I created this please check out my blog


Next up is Heidi with a great way to organize your Project Life supplies, or perhaps a way to organize other types of embellishments.  I know I'm more apt to use my supplies if they are organized and stored in something pretty!


Hello Everyone!  Heidi here with a little different project for today. 

 
I have been working on some project life pages for my son and I needed to find some type of organization for my cards that I had started to collect.  So of course my first thought was to reach out to Gina for some assistance- and this is what she came up with!  Isn't it beautiful!  
 It was very easy to put together just like all of Gina's organizers and home decor, I have included some photos at the end of the post with directions.  Remember that items like this come with detailed instructions on assembling them.   But quite honestly, my favorite part of these projects is decorating.  For this one I just covered the entire organizer in newsprint to give it a vintage feeling.  Then I added some of the little photo frames with some memory words.  
As you can see- the divided sections are perfect for the different size of cards.  And then there are the dividers that come with the box and you can purchase additional dividers as needed.  

Gina's Designs Product
Memory Keeping Organizers Dividers
Postage Frames

Putting your Organizer Together
Did I tell you that it was easy to put together ?
Did I tell you that you will get detailed instructions?
Well here is a little tutorial on putting it together:
1.  Lay your parts out on the table and always start with the center piece.
2. Start sliding all the part together and once they are together add a little glue to the slots.
3. Once all the center pieces are together set them onto the bottom and slide together and glue.
4. Finally- add the 4 outside pieces, glue and then you are ready to alter!

Now go and have a good time decorating your organizer! 
Related Posts Plugin for WordPress, Blogger...