Showing posts with label Texture Sheet - Diamonds. Show all posts

Wednesday, June 17, 2015

Father's Day Cards

Hi everyone!  Barbara here with my third post as Gina's Designs guest designer for June.  This has been a thrilling experience for me, and next month, I will be posting regularly as a member of their design team.

With Father's Day right around the corner, I thought I would make a couple of vintage cards of the masculine variety.  We gals find it so hard, sometimes, to leave the flowers and lace and other frilly things aside, so I hope I can help you out a bit today.

I call my first card "Family Man".


I first layered the "hats" paper onto a dark brown card stock layer, and then onto my base kraft card.  I cut a few of the printed papers to layer over that, edging each with brown distress ink.  

I next colored each of my laser cut chipboard pieces from the three sets listed below.
"Family"was colored with Dark Brown, Creamy Brown, Bisque, and Tangerine chalk inks.   Creamy Brown was used to add the ribbon around the hat and add highlights.
The hat was colored with Dark Brown, Creamy Brown, and Bisque chalk inks.   Creamy Brown was used to add the ribbon around the hat and add highlights.
The pocket watch was inked with the Brilliance Platinum Planet, then embossed with the Retro Circles embossing folder.  The raised areas were highlighted with Dark Brown chalk ink.  A metal clock face, hands and brad were attached to the face of the pocket watch.

The balloon base was colored with Blue Lagoon and Creamy Brown chalk inks.  I trimmed a small piece of the diamonds texture sheet to fit over the balloon, which was colored with Tangerine and Yellow Cadmium chalk ink.  When dry, the diamond texture was glued to the top of the balloon.
I used my Silhouette machine to cut the word "Man" from dark brown card stock and adhered all of the pieces to the card, as shown.

My second card is called "Handy Man".


I first layered the "rulers" paper onto my base kraft card, edging with Vintage Photo distress ink.

I used my Silhouette machine to cut out the words "Handy Man" from dark brown card stock.  I used tan and rust colored chalk pencils to add some dimension, and after adhering the letters, I shaded the words with a charcoal pencil and blending stump.
Each of the chipboard pieces were colored similarly as for the previous card, with just a few differences.  For the hammer head, I added a bit of the Brilliance Cosmic Copper over the Platinum Planet to give it a bit of a brass or coppery look.
The bike was painted a bit differently, as well.  I used Pitt Big Brush pens to color the tires (black), the seat (brown), and the metal part of the bike (white & cobalt turquoise), while coloring the spokes with a silver Krylon leafing pen.   Tiny metal gears were added to the bike wheels and randomly on the card front, and also some metal screw heads.
Two of the larger gears are Gina's Designs chipboard, which were heat embossed using Versamark ink and Rust Tapestry embossing powder.  To get a richer orange rust color, I added Rusty Hinge distress ink over the embossing powder.

Gina's Designs supplies used:

Other supplies used:
Pre-folded Kraft Card (5" x 7" )
Brown card stock (4-3/4" x 6-3/4")
Paper Pad: 6x6 Garment District (Marion Smith); Rock Island Route 4.5" x 6.5" pad (Paper Studio)
Silhouette cut file and machine ("Man" - used Segoe Script font)
Ink Pads: Dark Brown, Creamy Brown, Bisque, Charcoal, Blue Lagoon, Yellow Cadmium, Tangerine, Chestnut Roan Chalk (Colorbox); Platinum Planet Brillance, Cosmic Copper, Versamark (Tsukineko); Vintage Photo, Black Soot, Rusty Hinge Distress (Tim Holtz)
Embossing Folders:  Retro Circles embossing folder
Clock hands, metal screw heads (Prima); Metal clock face (Tim Holtz), tiny metal gears (Bead Landing)
Pitt Big Brush Pens (Faber-Castell): Black, Brown, White, Cobalt Turquoise
Krylon silver leaf pen
Rust Tapestry embossing powder
Charcoal Pencil & blending stump

Thanks for stopping by.  I hope you enjoyed my cards today and perhaps be inspired to make some masculine cards for those men in your life with this fabulous "Guy Things" shape set from Gina's.  

Have a wonderful and creative week! 

Barbara

Thursday, April 2, 2015

Remember the Journey

Hi everyone! Melissa here with a layout for Gina's Designs. My mother-in-law took this photo at Land's End, in Cornwall.
I had a lot of fun decorating chipboard, as usual! For the background I applied texture paste on a texture sheet, then sponged on gesso. I then painted with Viva Modeling Cream, then a little Lindy's, watercolors, and Twinkling H20s. I prepped all the chipboard with gesso. I drew some detail on the seahorse with a pencil, then painted it with brown watercolor. I added some gold perfect pearls. I took off some of the brown later with a wet brush, to give it a little more dimension, and put some more paint on different areas. On the gears on the upper right,and the flourish at the right of the photo I poured gold embossing powder on wet gesso, then heated it. The gesso made it bubble up for some extra texture.I dry brushed some Vintaj patina paint on top. I painted the gears at the bottom right and center of the photo with brown watercolor, I applied a layer of glossy accents and put the items on a pile of crushed up mica flakes. I topped them with some patina paint. For the title work I painted with twinkling H20s, then put on some Versamark embossing ink. I poured on chunky clear embossing powder and heated it. 

Thanks for looking, and I hope you find some scrappy time for yourself today!

Gina's Designs products used:
Steampunk Frame
Curly Word: Remember
Sea Horse Shapes
Layered Flourish Renata Small

Other Products:
Paper by My Mind's Eye
Prima flowers
 Twinkling H20's
Viva Colour Modeling Cream
Lindys Stamp Gang
Perfect Pearls
Windsor and Newton Watercolors
Tsukineko Chalk Ink
Sizzix Tattered Florals
Liquitex Texture Paste
Sizzlits Spring Greenery
Vintaj Patina Paint
Stampendous Mica Flakes
Martha Stewart Silicone Mold
Melta Art Ultra Thick Embossing Enamel


Tuesday, February 17, 2015

RubberMoon Cross Promotional Tags

 Hello crafty friends, I am here to share with you today the tags I created using stamps by RubberMoon & laser chipboard by Gina's. I used the deco cat stamp on both tags. The cat is looking out the window on both tags.
Tag 1
Tag 1 was cut from a Accu cut die Album tags using  corrugated paper.  I used graphic 45 paper layering two of the secret garden tags/cards  over the diamond textured sheet and intricate doilies.


 Tag 2
Tag 2 cut from the Accu cut album tags using Robins Nest winter snowflake paper. The cat was stamped on the chipboard cat that was painted with spun sugar distress paint.


The cat is looking at the home across the yard through the lace curtains.


Cat
Robins Nest Paper - Winter snowflakes

Other Supplies Used:
White Cotton Trim
Venuses Lace
Micheal's Flowers
Rosette trim
Wild Orchid Crafts - pearl sprays
Flat lace 
Wild Orchid Crafts - white leaves
Stampin' up stamp
Distress paint 
Prima doily trim
Graphic 45 - Secret Garden

Monday, February 9, 2015

Brush Caddy

Good morning crafty people! I am determined to organize my craft room! So, I started with the brush caddy from Gina.
I painted the handle and inside with rust chalk paint. I added texture to the handle with the Texture Sheet- Diamonds. I used it as a stencil with texture paste.

For the caddy, I covered it with vintage book paper. I used distress ink on the edges and then covered the paper with clear wax from Folkart.

To decorate, I added pieces of the Diamond Texture Plate and in the corners I added  the Art Deco Corner Set.
Have a crafty day!
Deann
Gina's Designs Products Used:
Art Deco Corner Set
Texture Sheet- Diamonds
Brush Caddy

Tuesday, October 28, 2014

Altered Cigar Box Cross Promotional Project by Kathi

Kathi here to share my last cross promotional project with Craftsupplies1, an altered cigar box.


Using the flat red lace,  I created a handmade flower with a streamer descending from the bottom.  In the center of the flower I have a pearl center and a butterfly resting on the flower.  I placed a stacked flourish off to the left side.  The flower is resting on a large crocheted doily that I received in a swap. I painted the butterfly scribbled frame, and added a photo mat behind it. I placed two metal butterflies from Craftsupplies1 in the lower right corner.

 Here is a close up of scribbled butterfly frame, and the butterfly has distressed stickles painted on it.
  Here is one of Gina's new stacked flourishes with one layer painted with white gesso and the other with black gesso.
 Inside of the lid, I used Gina's textured sheet, painted with white gesso.  Layered on top is a red doily and on top of the doily I placed a dressform and a frame.

 After the chipboard pieces were painted,  I distressed the dress form and placed the word love over the bodice along with a flower bunch and a flower cameo. A rose bunch was placed on the lower right which is from Craftsupplies1.

 Close up of flower bunch from Craftsupplies1.

Close up of the frame and textured sheet from Gina's Designs

Supplies Used:
Gina's Designs Laser Cuts:
Scribble Frame - Butterfly
Layered Flourish - Renata
Flourished Frames - Evie
Texture Sheet - Diamonds
Dressform 1 Miniature Shape Set
10 Words

Craftsupplies1:


Metal Butterflies
Roses
 Flat Red Lace
 Black -satin pleated trim


Other Supplies Used: 
Red & Black Doilies from Michael's
Black & White Gesso
Black/Red cameo
Crochet Flowers
Distressed Stickles
Glossy Accents
Paper from DCWV


Tuesday, August 12, 2014

Layouts by Nancy and by Donna for our August Cross Promotional

Hello Friends!  Today we have two projects to share, both are part of our August cross promotional with Kitty's Scrap Post.  First up is Nancy with a vintage Paris themed project combining Gina's Designs chipboard with papers from the Heartbreak Kit by Kitty's Scrap Post.


Hi Crafty Friends, it's Nancy here!  Today I'm sharing a layout I created using Gina's Designs chipboard and a digital paper kit from Kitty's Scrap Post.  I really enjoy printing my own papers, it's so much more versatile.  This paper kit is gorgeous combined with some Parisian chipboard shapes from Gina's Designs.  I'd been wanting to use our large chipboard Eiffel tower, as well as the pen and ink set, so I was really excited when I saw this paper.   I really love using the unfinished wooden frames from Michael's to enhance my layouts and to give me more room to play with some mixed media techniques.  

To decorate my frame on this project, I printed out some of the design paper onto tissue paper and decoupaged it around the frame.  I simply place  double stick tape on each end of a sheet of printer paper (I used my ATG gun), then lay a sheet of tissue paper over it.  Trim off excess tissue paper before inserting the sheet into your printer.  Over the decoupage I added gesso, and stenciling with crackle paste, and a little stamping here and there.  I also fussy cut some of the elements from the collage sheets included in the kit and incorporated them into my layout and around the frame.  I used my photo printer with matte photo paper to print the vintage lady image which is also included in the kit.  I created the flowers at the bottom right of the frame using dies and leftover scraps of paper from the collection.  


Gina's Designs Products Used:
Eiffel Tower - 8 inch
Pen and Ink Shape Set
Texture Sheet - Diamonds

Design paper by Kitty's Scrap Post
Heartbreak Full Kit


Next up is Donna who has also chosen a Paris theme for her project, but using different papers for a completely different look.

Hi Everyone, it's Donna here!  This month we were able to use some of the beautiful papers from Kitty's Scrap Post along with Gina's chipboard to create our projects! I used some of Gina's beautiful Parisian shapes with The French Seamstress collection from Kitty's Scrap Post.

The photo in my layout made me think of the special relationship we have with our very close friends, and this quote:
"The only way to have a friend is to be one"
Ralph Waldo Emerson


I used heat embossing powders and glass glitter on the Parisian chipboard shapes.


 I made two charms with 1 inch circle images that come in the paper kit with Gina's punch elements scalloped chipboard.  They are so cute and fun to make!  They can coordinate with any project because you use a 1 inch circle punch with any paper you want to use!  Many of the digital paper collections at Kitty's Scrap Post have 1 inch circle images all ready for you to simply punch out and mount on Gina's punch elements chipboard set. .


I use pop dots/squares on almost every project to add some dimension, especially when using chipboard pieces. I will use them under the chipboard pieces and/or under the surrounding embellishments.  Try it and see the difference it makes!

Thank you for stopping by today and I hope you will try making some charms for your next project!

Gina's Designs


Other Products
Pink lace - Tresors de Luxe
Hat pin - Little Scrap Shop
Paper doilies
Pink flowers - Petaloo Botanical collection
Doily stencil
Lightweight spackling


Thursday, July 17, 2014

New Paint Brush Caddy by Mary

Hello fellow crafters! As promised I have the new paint brush caddy from Gina's Designs! It is designed to fit into one of the top caddies on the art storage cabinet.  As I'm sure you have already figured out, I plan on using this as a free standing item.
While it may be designed to hold your paint brushes, I wanted to give you some other ideas of what you could place in this great caddy. The compartments are deep enough to hold your smaller scissors or bone folders!
This is one of the new Word Stackers in Gina's store. The other side of the box says inspire!
The wooden key is an element piece that Gina created and sent to me in my DT box!


Gina Design Products

Other Products Used
Please visit my blog for the complete list!

Monday, June 2, 2014

June Sketch Challenge and sample layout by Nancy

Welcome to the June Sketch Challenge!

Each month, on the first Monday, a new sketch will be provided.  Use the sketch to create a layout, card or other craft project.  Winner will be drawn from all eligible entries and will receive a $10 gift certificate to Gina's Designs online store.  We encourage you to use Gina's Designs products in your project but it is not required to be eligible to win.  You have until the first Monday of the Following month to enter and the winner will be announced on the blog on the second Monday of the following month.  Use the Link Up tool below to enter.
Here is the sketch for June


Here is my take on the sketch.  This month I am using one of my daughters selfie photos in a mixed media layout.  I am featuring one of our texture sheets which made creating the rest of this layout so easy.  I painted the sheet with gesso followed by white pearlized paint by Folk Art.  I painted some of the other chipboard pieces with shimmerz paint and also used the same paint to cover a few random diamonds in the texture sheet to tie the layout together.


Gina's Designs Products Used:


Friday, May 23, 2014

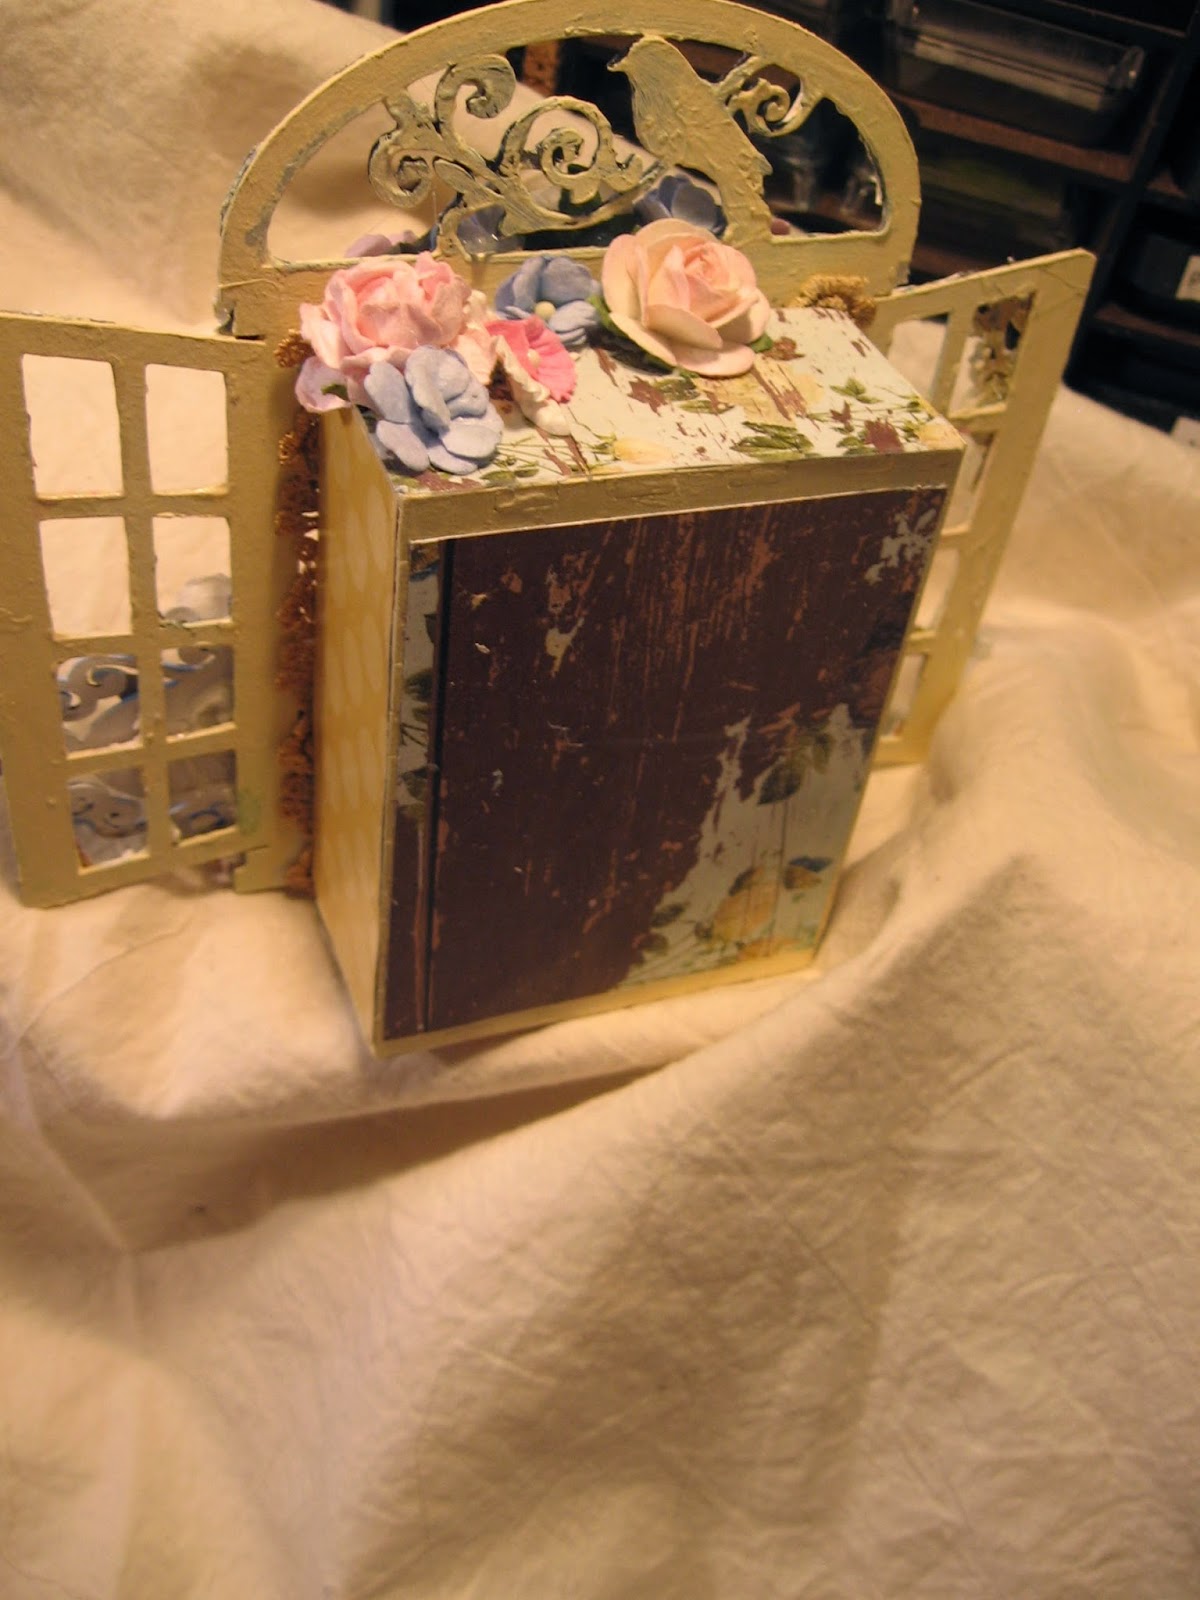
Shabby Cottage Window Shadowboxes


 Happy Friday everyone! Today I would like to share a fun little project I created to hang on my wall in my kitchen. These are my Shabby Cottage Window Shadowboxes, which are made from Gina's Bagatelle Boxes.

 I really love these little bagatelle boxes, they come in lots of different sizes, and you can purchase them in a set of 12! I had a lot of fun with these, and got out the Large Cottage Windows to place over the top of the boxes to create the illusion of looking in a cottage window. I did a lot of mixed media work on the windows, and it was fun to get my hands dirty!

You can see in the first one, several of Gina's other pieces, such as the postage stamp frames, gears, diamond texture sheet, stackable labels set, and a few pieces from the spring shape set as well. I embossed, painted and stamped on most of them and of course added some laces for a finishing touch.


Side & Back View of the Bagatelle Boxes


Thanks so much for stopping by to take a look at my shadowboxes and I hope you will give them a try!

Gina's Designs Products Used

Other Items Used
My Minds Eye Pretty Things Paper
Wild Orchid Craft Flowers
Americana Baby Blue, Buttermilk and Snow Paint
Stampendous Shabby White Embossing Powder
Lace From The Lace Mama
Shimmerz Texturez & Dazzlerz Paints
Wood Embellishements and Lace From My Stash
Wood Dressform by WhichCraft


Related Posts Plugin for WordPress, Blogger...