Showing posts with label Art Deco Corner Set. Show all posts

Friday, November 27, 2015

Vintage Christmas Card and Tags

Hello! It's Gloria Stengel back again with another project. I made a card and two tags for you this week. (If you missed my Christmas composition box from last week, click HERE to see it.)
My favorite type of Christmas decor is vintage with traditional colors and a bit of rust and whitewash tossed in for good measure! I like to use chipboard elements on cards and tags because it adds a lot of detail and interest without a lot of bulk or weight.

The card is 6" x 5" and made with dark brown cardstock. I used just a bit of designer paper because I wanted the chipboard elements and the sentiment to be the stars of the show. {Stars...get it?!} I covered the oval element from the Stars and Flourishes Borders and Corners Set with gold pigment ink and then embossed with Aged Bronze Embossing Enamel. I made sure to allow the enamel to look pitted and aged, with a few bits of the original chipboard showing through. 
I decorated the star oval with snowflakes from the Winter Shape Set and the  Snowflake Shape Set. I sprayed the snowflakes with white shimmer mist, and then embossed them with sparkly white embossing powder. The buttons are tied with kraft twine and then glued to each snowflake.

I covered one of the keyholes from the Keys and Plates Shape Set with gold pigment ink. I added tiny gold brads to the keyhole. Each flower was dipped in gold ink before I glued them to the card.

I decorated the inside of the card with some leftover bits of paper and a stamped greeting.
I always need extra tags around the holidays, so I made two tags to match the card. 
I added a bit of paper to the front of the tag before adding the chipboard elements. I sprayed the star flourishes from the Stars and Flourishes Borders and Corners Set with white mist and then dabbed them with watermark ink. I then embossed the flourishes with embossing enamel. I mixed white embossing enamel with gold embossing powder to make a custom enamel! I love how "clumpy" and thick the enamel is, but the areas with the gold embossing powder are thinner, sort of like rust. It makes the chipboard look amazingly vintage!

I sprayed the word from the Words and Phrases 1 set with Fire Baseboard Mistable Paint and Pearl Glimmer Mist. I added some "gilded" flowers and some bits of paper the I curled around a stylus. I also tucked a few faux postage stamps into the flowers.

I decorated the small tag with one corner from the Art Deco Corners Set, which I sponged with gold pigment ink. I sponged the miniature bookplate from the Miniature Bookplates Shape set with silver pigment ink. I added tiny silver brads to the bookplate. I used a Shabby Blue Embossing Enamel for the stars.

I hope you use up some of your paper scraps and bits of chipboard to make a few cards and tags this holiday season! Come back next week to see more...fun with chipboard!

~ Gloria Stengel: Scraps of Life 


Supplies:
Gina's Designs Laser Cut Chipboard:


Other Products:

Ink: Memento Rich Cocoa and Rhubarb Stalk dye ink, Delicata Silvery Shimmer and Golden Glitz pigment ink, Top Boss Watermark ink 
Mist: Tattered Angels Fire Blackboard Mistable Paint and Pearl Glimmer Mist, Deco Art White Shimmer Mister
Embossing powder and enamel: Stampendous Shabby Blue and Aged Bronze EE, Hampton Art glitter white EP, custom mix white and gold EE
Paper: Graphic 45 'Twas the Night Before Christmas, The Paper Studio Old World Winter
Cardstock: WorldWin Papers Cocoa and Natural
Stamps: Verve Stamps Holiday Treats, Sweet 'n Sassy Stamps Christmas Innies
Tags: Graphic 45
Ribbon and twine: Really Reasonable Ribbon Light Silver and Old Gold Diagonal Stripe Satin ribbon, Iridescent White Metallic String
Flowers: Wild Orchid Crafts
Brads: Creative Impressions
Buttons: craft supply
Tools: corner rounder, Spellbinders Framed Tags One die
Adhesive: Ranger Glossy Accents, Scotch 3M ATG tape, hot glue

Wednesday, September 16, 2015

Tranquility with Guest Designer Jackie

Hello Everyone- Jackie here again, for another Wednesday guest designer appearance!Gina, thank you so much for inviting me! I can't tell you just how much all of your wonderful comments and Facebook likes and Google+'s have meant with my last project for Gina's! Thank you,Thank you!!
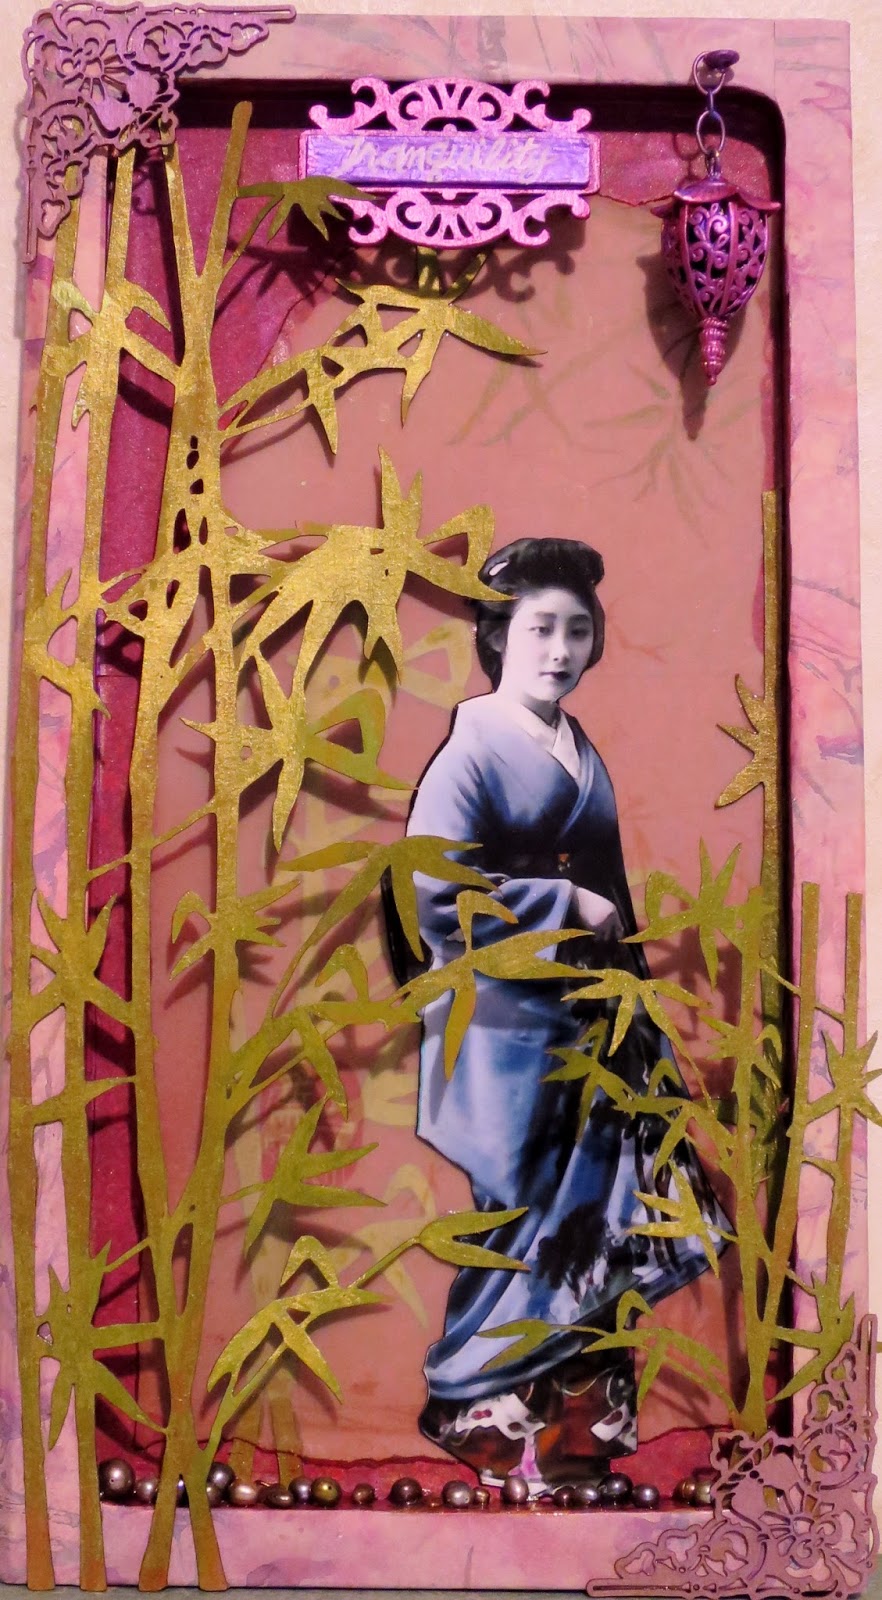
"Tranquility"

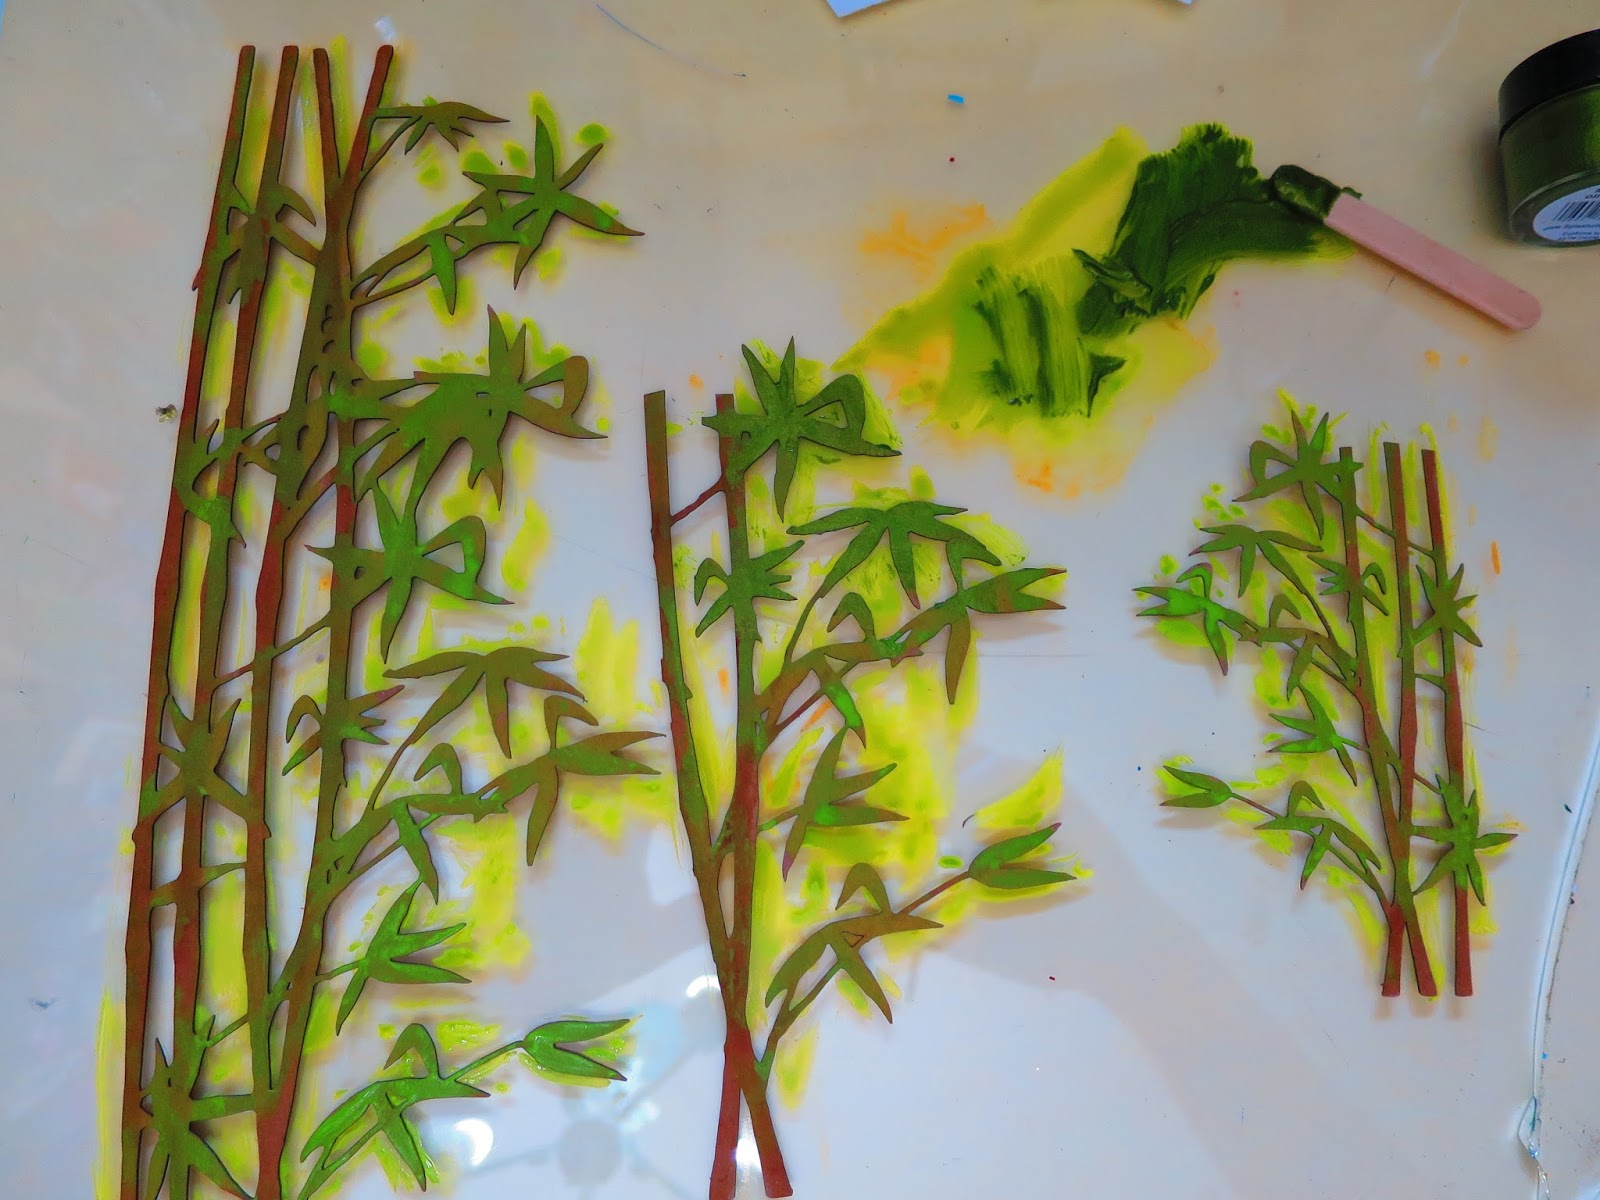
When I saw the Bamboo Shape Set at Gina's, I ooohhed and
aaahhed and knew just what I was going to create. What I started with is a wood substrate (I think this was from a desk that held pens&pencils) that I gessoed and papered with vintage pages and scrapbook paper background. The reason for choosing this substrate was because I had layers in mind, and plus, I love to up-cycle!
  

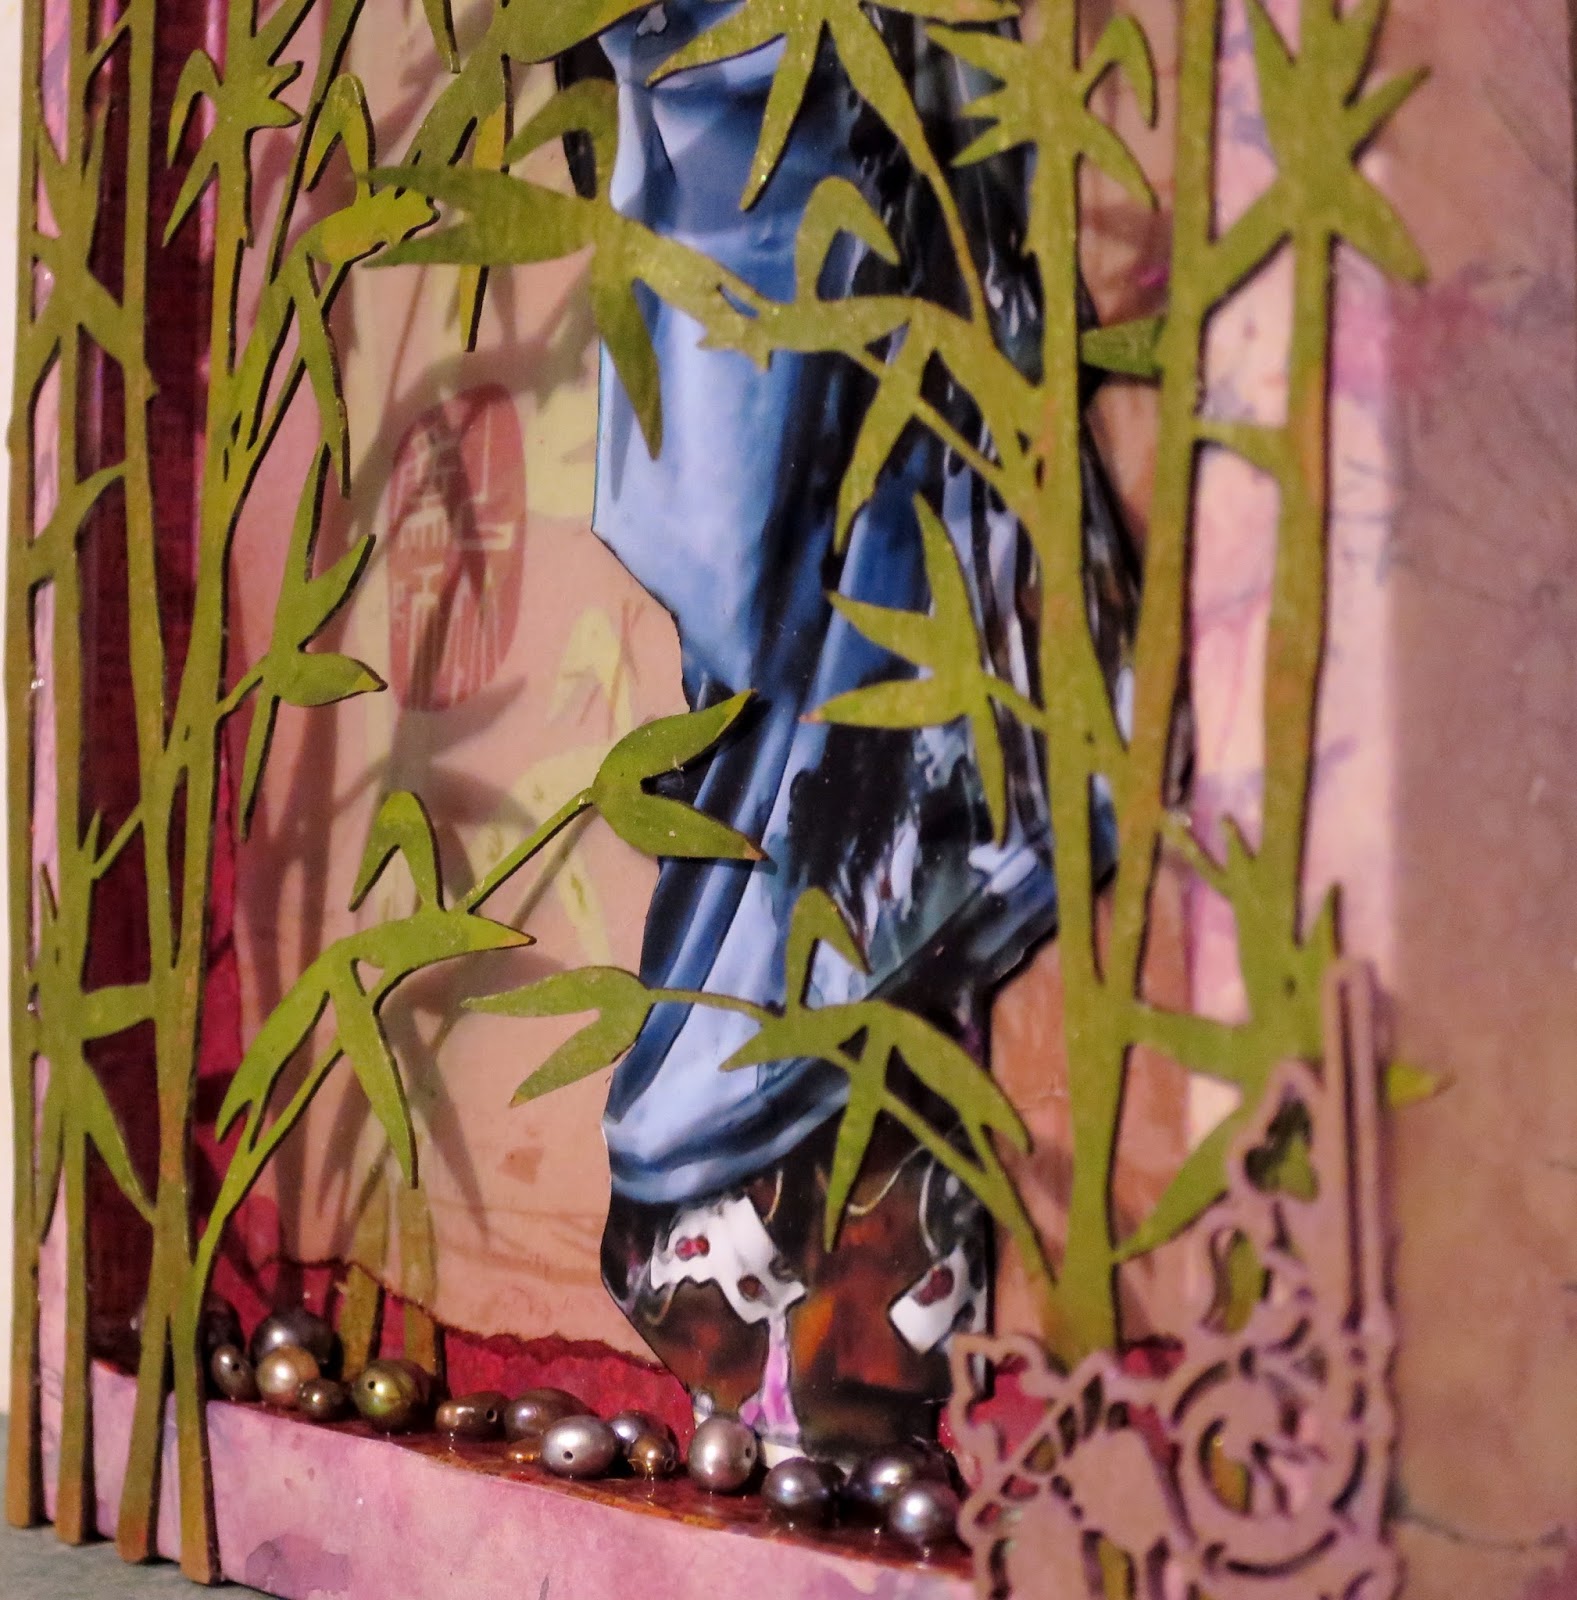
After giving the bamboo pieces color,I began by layering with velum paper and then more bamboo. These pieces above were one piece that I snipped in two.
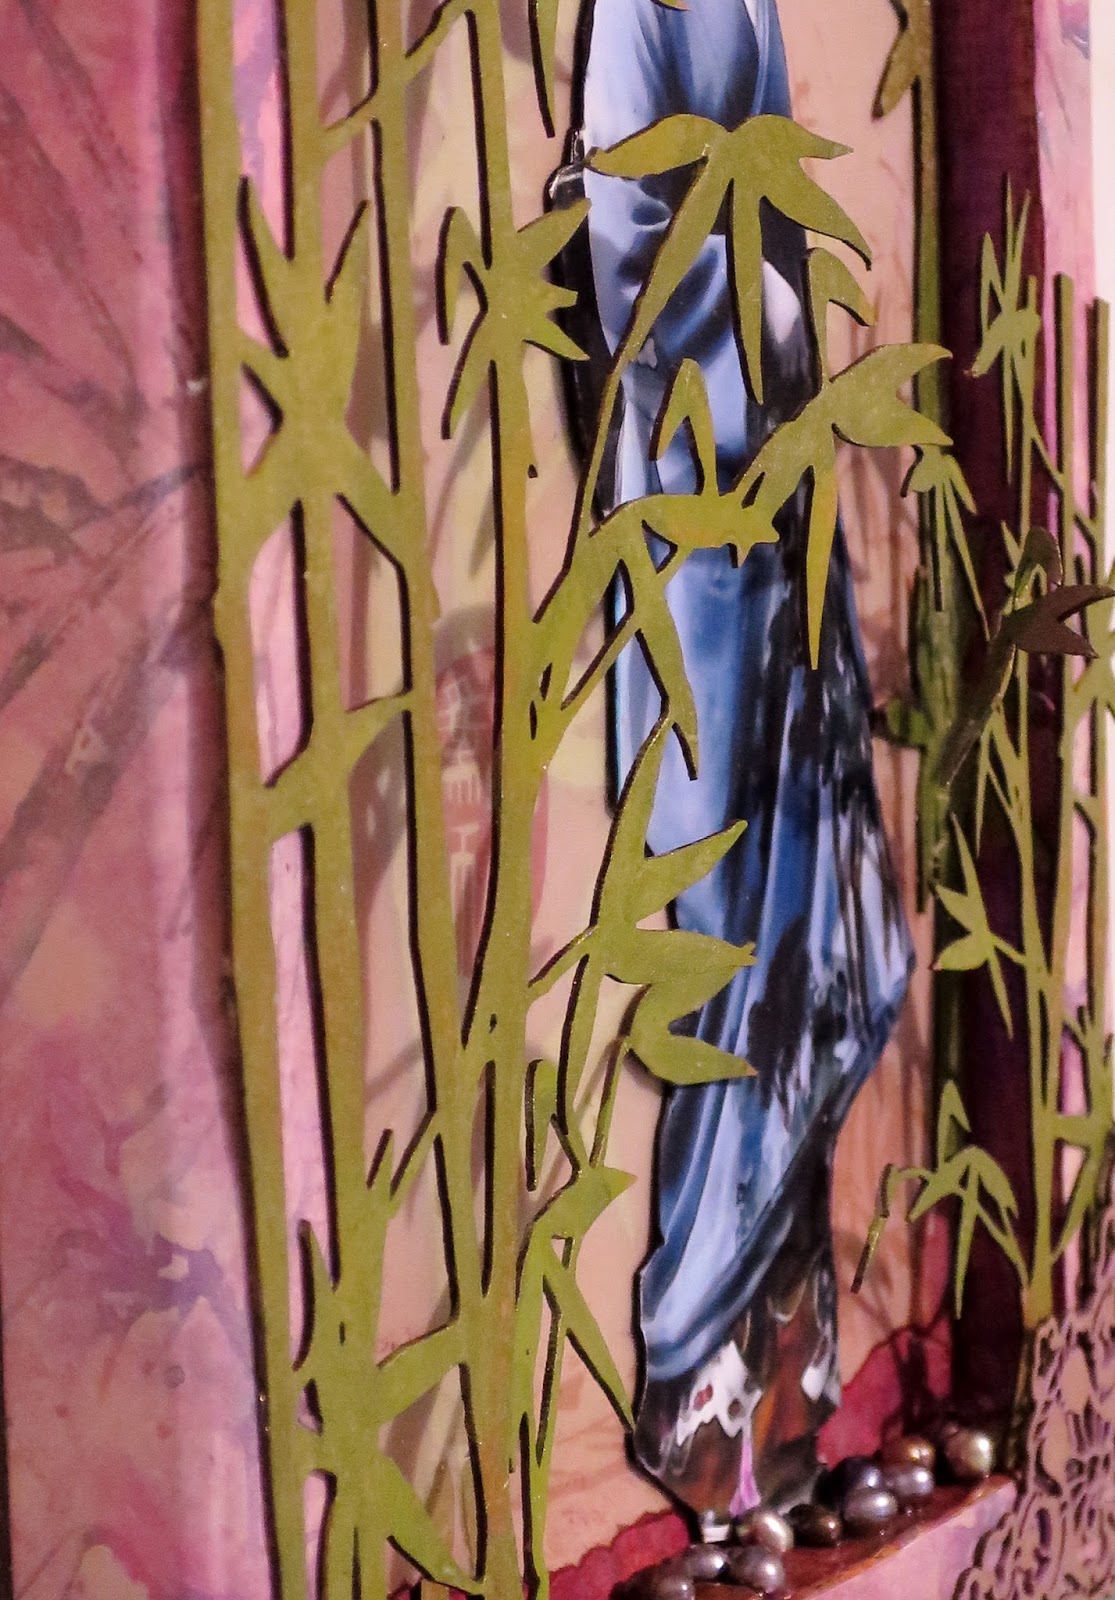
I hope you can see in the photos, the effect I was going for by gluing down some areas of the top bamboo against the background to give depth. 


For my title piece tranquility I used one of the Stackable Labels Shape Set.
This was attached by painting a wood stack and gluing it to the backside of the label.

 
 At some point, I decided I wasn't digging the vintage papers and covered them with scrapbook paper.


And for my final accents, I used a pair of corners from the Art Deco Corner Set which gave a nice finished and polished look. 


 I  really am pleased with how this turned out. Again, let me say just how beautiful and detailed the cuts are from Gina's Designs pieces! By now, you can tell that I am a fan!!
Gina's Design's Products used:
Bamboo Shape Set
Stackable Labels Set
Art Deco Corner Set

Other Products used:
DecoArt Media Fluid Acrylics
Colour Arte Paints


Thanks so much for the visit-see you next week!   Jackie

Wednesday, September 2, 2015

Standing Flip Book by Dianna

Hi Everyone, Dianna here with a collaboration with Gina's Designs and The Robin's Nest.  I chose Gina's Designs Standing Flip Book to use with The Robin's Nest Cardstock.  I simply adored using the Saffron Sunrise and the Venice Collection Cardstock.


First I spray painted the Standing Flip book bronze (make sure you do not spray paint the notches and do not let paint get into the holes).  On the corners of the stand and underneath frame I used Gina's Art Deco Corner Set.   I traced chipboard pages onto The Robins Nest, Saffron Sunrise Collection Cardstock, and cut out and distressed with ink while watching a movie.  I used Twinkling H20's on all the chipboard pieces.  Above, I used a piece from Gina's Parisian Shape Set, used punch to create the fleur-de-lis and added two buttons. The Robin's Nest Cardstock used are Striped Honeycomb and Fleur Honeycomb.


I used Gina's Lace Border Stick and The Robin's Nest Cardstock - Saffron Honey.


On this page I created a fold out using a cracker box and clipped it back with a key paperclip.  I used three different fall off from left over paper that I cut the pages from The Robin's Nest.  I had fun with the Twinkling H20's and created a burnished effect by layering the H20's light to dark.  I use a foam makeup applicator to apply each color.  


This is the backside of the fold out.  I used The Robin's Nest, Fleur Honeycomb Cardstock and Time Flies Rubon.


I thought this picture showed how nicely the Standing Flip Book pages looked with The Robin's Nest Cardstock (Fleur Honeycomb)  The butterfly is from Gina's Designs (special order).  I used Twinkling H20's to create the tarnished effect.  


On the last picture (there are actually 12 different pictures, 6 per side of the flip) I used Gina's Deco Lattice Panel 2 and The Robin's Nest, Stripe Tropicana cardstock.  I used Twinkling H20's on the lattic and some extra flowers to pull in some the green from the frame.  This picture is on the backside of the flip out and part of the key paperclip is showing.  

Thank you for looking!


Items Used


The Robin's Nest


Monday, February 9, 2015

Brush Caddy

Good morning crafty people! I am determined to organize my craft room! So, I started with the brush caddy from Gina.
I painted the handle and inside with rust chalk paint. I added texture to the handle with the Texture Sheet- Diamonds. I used it as a stencil with texture paste.

For the caddy, I covered it with vintage book paper. I used distress ink on the edges and then covered the paper with clear wax from Folkart.

To decorate, I added pieces of the Diamond Texture Plate and in the corners I added  the Art Deco Corner Set.
Have a crafty day!
Deann
Gina's Designs Products Used:
Art Deco Corner Set
Texture Sheet- Diamonds
Brush Caddy

Thursday, December 25, 2014

Trinket Box Trio


Hi everyone! Marla here with my final project. It's been so much fun to be a part of the team for the month of December! For this project I decided to make a few trinket/jewelry boxes in a summer/beach theme.
 I altered a trinket box and 2 ATC shrines that Gina carries in the store. I wanted to go with a beach/summer theme so I painted them black and covered them with G45 Tropical Travelogue paper
 On the top of the trinket box I used one of the flourished open circle frames from the store as well as the Art Deco corners. I used textured paint on the frame to give it a sandy feel and painted it with black and teal and a hint of white.
 I covered the inside with the beautiful paper and also put some soft felt to line the bottom of the box.
I altered the ATC shrines into little earring display boxes. I simply screwed two eye hooks inside each of the boxes. You are then able to hang your favorite earrings. Check out Gina's Designs to pick up all the items I used and more!
I hope you enjoyed my creations as much as I did making them! 
Happy Holidays!
Marla Rizzo

My YouTube channel:
http://youtu.be/wuEkYx9ogEU
 

Gina's Designs Products Used

Related Posts Plugin for WordPress, Blogger...