Thursday, October 31, 2013

Making Her a Star


Today Shanna here to share a layout of my cutie before her bad streak came out. She loved touching everything and was always so inquisitive. Being outside was always fun for her and to this day she still loves plants and tearing leaves off of things lol. 

We had so much fun with this photo shoot and the pictures were the perfect size to fit the filmstrip. I couldn't help making my baby a star! 


Items Used:
Gina's Designs - Heidi's StarsWords & Phrases 2, and Filmstrip 1
Bo Bunny Papers and Stamps
Lindy Stamp Gang Sprays
Heidei Swapp Spray
Prima Stencils and Chalk
Creative Inspiration Paints

Wednesday, October 30, 2013

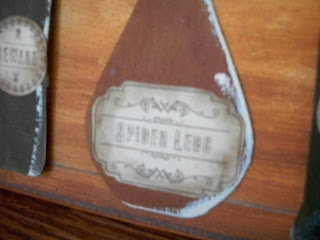
Halloween Mini by Rashida

Hello! Rashida here with you today sharing another mini album using Gina's Designs chipboard shapes. I had such fun making this mini album. Take a look inside! Also please see more photo's on my blog.

For this mini I used:

Spooky shape set
Birds on a wire
3D House Mini Album ( FENCE, SHUTTERS)
Apothecary Jars
Spiderweb Shape Set
Haunted House Silhouette 1
Glassine bags
Fall Shape set 

paint
stickles
Close To My Heart Halloween paper
Gel Pens
Close To Mt Heart Rub-ons
K and Co Halloween embellishments
Rhinestones

Flowers 
Buttons 


Candy Apples Tutorial

These are candy apples that came from Gina's Designs Fall shape set. I used these to make a few of the tags in my Halloween mini.
Of course they start as craft chipboard but with a little creativity you can make these cute chippies spectacular.

For these apples I used
Gina's Designs Fall Shape Set
Ruby Slippers Stickles
diamond glaze
Paint
Seed beads
wax paper

First use stickles to cover the apple , let dry
Next on wax paper mix brown acrylic paint with diamond Glaze
once its mixed well use a flat object to spread the mixture on the apple. I used a plastic knife.
spread it on so that it looks like a dipped apple.
finally while it's still wet sprinkle the seed beads onto op the wet mixture.
let dry.


Tuesday, October 29, 2013

SPOOKY!!!

Hi everyone Simply Monica here with a altered Halloween banner from Gina's Designs.  This was a super fun project to make.  I love the corrugated cardboard and you get precut rosettes made form newspaper that I misted and inked.  I added a bunch of different elements on this project too.

 here I used some burlap and mesh ribbon from May Arts, feathers, and some flowers

 here you can get a closer look I inked the cardboard and misted the letters

 I used a Steampunk doily from Gina'a and a Gears Corner Border piece as well
I hope everyone enjoyed my post for today and get ready to Trick or Treat!!
Simply Monica!

Gina's Supplies Used

Monday, October 28, 2013

Halloween Canvas

Good morning  ,Deann here with a Halloween Canvas.

I started with the Old Bottle Shape Set. I used Distress Inks to color them. Then rubbed white gesso onto
some of the edges of the bottles.
Then I printed out the Freebie Friday Spooky Labels from Gina's blog.
Cut them out, inked the edges and attached them to the bottles. 


Next I prepped the canvas.
I used a paper towel crunched up to tap  gesso onto the canvas. It adds a little texture .
Then I used the Brick Wall  Chipboard pcs. I used the Individual Bricks from the set.
When everything was dry ,I then painted over everything with rust, orange and brown paints.
I used the paper towel to add the paint . I dipped it into the paints  kinda mixing them together but not a lot.
When that was all dry  (I used my heat gun a little) I took my Walnut stain Distress ink pad to
the edges of the canvas and over the bricks . 


I then added the bottles to the Canvas. I used pop dots for the 2 green bottles.
Thanks for taking a look :)

Products used -
Gina's Designs Chipboard
Brick Wall
Old Bottle Shape Set
Gina's Designs Printables
Freebie  Friday Spooky Lables


Sunday, October 27, 2013

Memories of Summer

Hi Everyone. Nancy W here with a summer's end project using Gina's Designs postage shadow box. Before putting the shadow box together, I spray painted the pieces with a white acrylic spray. Since the design was going to be *beachy*, I didn't worry about the paint coverage being equal everywhere.


Once the paint dried, I put the pieces together and inked them with
Tim Holtz Distress Ink (Antique Linen)
followed by
Wendy Vecchi's Archival Ink (Cornflower Blue)
Since the theme was a beach theme, I chose 
Creative Imaginations papers designed by Christine Adolph.
It's an older design but very well loved.


The outside edges of the shadow box were covered with this scrapbook paper.

I found this paper design on Pinterest
and fell in love with it. Apparently it's from the late 1800's,
although I couldn't find the original source.
This was my inspiration paper for the entire shadow box design.


It was printed in the same size as the largest rectangle (4" x 6"),
inked the edges with Antique Linen Distress Ink
and then added the 2 style stones, shells and sand.
The style stones start out pure white so that you can add any color you desire.
I've had these in my stash for years and decided to break them out for this design.
The shells are embossed into the stones so that you can add paint in the recesses
to bring out the design.
I used Viva Precious Metal Effects for Creative Imaginations
in the creases, wiped the excess off and then added more color with
Creative Imaginations Silks


The rectangle and smaller squares were covered with more CI Christine Adolph paper.
After adding bottles with sand and shells, 
a postage stamp from Graphic 45 finished off this rectangle.


This adorable banner was cut from one of 
Gina's Designs banner packages.
Love those banners!
They are chipboard so easily covered with
CI paper and a stripe from Graphic 45.


The *Memories* word was painted with blue acrylic
then a simple process for crackling followed by cream paint.


I hope you enjoyed my project as much as I enjoyed making it.


Now I think I need one with a travel theme!


Saturday, October 26, 2013

Halloween Layout

Hi, it's Nancy here today with a layout featuring my dog Billie Jean all dressed up for Halloween.  I had fun dressing her up in costumes from the dollar store.  Of all my dogs, Billie Jean is the only one that actually seems to enjoy hamming it up for the camera.  I embellished this layout by combining chippies from Gina's Designs and some fun new stencils I had ordered online.


I inked the hanging clock with prima chalk inks in black and orange, covered the back of the clock with frosted film, and applied glass microbeads to the sticky part.  All other chippies were also covered in Prima chalk inks as well as the intricate doilies peeking out from the top of the layout.  I made the layered witch embellishment at the bottom right of the photo by beginning with a doily, then added a scalloped orange glittered paper layer that I had punched with a scallop punch, then added the witch image that was part of the paper line by using a round punch.  The layers are pop dotted to make a dimensional embellishment.  The doilies are so useful in making your own embellies.  

Gina's Designs Products Used:

Hanging Clock Set
Spider Web Shape Set
Swirled Cluster Base Leafy Flourish
Doilies (I got mine in black by special request)
Intricate Doilies
Barbed Wire

Other Products

Dylusions Stencils -  Lucious Leaves and Checkered Dots
Prima Chalk Inks
Dylusions Ink Sprays
Crafter's Workshop Mini Deco Doily Stencil Doily
My Mind's Eye Wicked Mechant Malvado papers
Flower vine by Prima
Petaloo Orange Velvet Flowers
Tim Holtz Frosted Film
clear glass microbeads


Friday, October 25, 2013

Freebie Friday Fall Cracker

Crackers are a European tradition that can be so much fun.  Filled with small gifts, candy and confetti, they are perfect for holidays and parties.
If you prefer the pdf file you can download it here:  Fall Cracker
Here is a sample made by Angela.  You can check out more photos on her blog.

Thursday, October 24, 2013

Mixed Media - Moment In Time

Hello! Dawn Rene here with you to share a mixed media canvas I made for Gina's Designs with lots of their incredible chipboard shapes!

The canvas size is 12" x 12" and it was designed around the theme "Life's Just a Moment In Time."
Moment In TIme Mixed Media Canvas

Here is a brief tutorial....

1. Cover the canvas with gesso

2. Color the canvas with Faber-Castell Gelatos using a watercolor brush
Moment In TIme Mixed Media Canvas - 2     Moment In TIme Mixed Media Canvas - 3
3. Add some texture with molding paste and stencils
Moment In TIme Mixed Media Canvas - 4     Moment In TIme Mixed Media Canvas - 5

4. Paint the chipboard shapes with gesso (I didn't paint all of them with gesso - Paint work well on gesso, stains and sprays not so much)

5. Let everything dry!

6. Layer on all the chipboard shapes and embellishments (this is my favorite part)
Moment In TIme Mixed Media Canvas - 6     Moment In TIme Mixed Media Canvas - 7

7. Spray and paint away until you get get it the way you like it
Moment In TIme Mixed Media Canvas
Thanks for stopping by!

Gina's Designs Supplies
Chipboard and Cardstock Shapes: Gears Shape Set, Cardstock Doily Set Steampunk, Skeleton Clocks, Pocket Watch Assorted Sizes, Hinges Shape Set, Miniatures Shape Set - Guy Thing, Steampunk Shape Set, Chain Borders

Other Supplies
Inks and Paints: Tim Holtz' Distressed Inks and Paints, Faber-Castell Gelatos, Dylusional Ink Spray
Embellishments: Paper Flowers, Twine, Prima Trinkets, Buttons
Tools: Stencils, Gesso, Molding Paste

Wednesday, October 23, 2013

Steampunk Idea Box with Marjolaine

Hello everyone, Marjolaine here with another tutorial using Gina's Designs chipboard.


Embossing is one of the easiest and most versatile ways to enhance metal and
using an embossing folder makes it even more effortless. In this
tutorial, I'll show you how to emboss a chipboard piece that is
covered in metal foil tape. The added dimension of embossing combined
with the luster of the foil creates a fabulous finish that will add
vivacity to any artwork.


Step Two: Cut around your chipboard shape with a pair of scissors. You'll need to
leave enough tape to be folded over the edge.


Step Three: Rub he surface of your chipboard to make sure it's adhered and fold the
edges of tape over the chipboard.


Step Four: Place your chipboard piece in an embossing folder and run it through an
embossing machine.


Step Five: Coat your piece with acrylic paint and a paint brush. Set it aside to dry
completely or dry it with a heat tool.


Step Six: Sand some of the paint off with a sanding chip. 


Step Seven: Coat your piece with a different color of paint and allow it to dry
completely.


Step Eight: Sand some of the paint off with a sanding chip.


Step Nine: Squeeze a few drops of alcohol ink and blending solution on the felt of your
blending tool and rub it on a few areas of your chipboard piece.


Your chipboard pieces are now ready to use on your project.With
a few different embossing folders you can create a quilt like effect
on your projects and really change things up. The metal foil tape can
also be applied in strips to a larger piece and a rectangular sheet
would make a wonderful book cover or canvas background. 

For my other chipboard pieces I painted them black and added a clear
 layer of distress crackle paint. 
Hope you enjoyed this tutorial and will try this technique soon! 

Supplies 

Chipboard pieces from Gina's Designs
 (Steampunk 2 Shape Set)
Alcohol ink

Blending tool with felt applicator
Blending solution
Embossing Folders
Embossing machine
Acrylic paint
Metal foil tape
Sanding chip
Scissors

Related Posts Plugin for WordPress, Blogger...