Thursday, April 30, 2015

Play Hard Flip Book

Good day to all! Today I will be sharing my flip book which I used the Boys Shape Set on. This is perfect gift for a baby shower or a child's first birthday, or a gift for grandma. This has six pages for a total of 12 area's to place photo's
 

 You can so many neat textures with the all the shapes the come in the All Boy Shape Set!
Gina's Designs Supplies Used:

Make sure you stop by the blog tomorrow! Next month Gina's Designs turns THREE!!!! We will be having a lot of things happening during our birthday month!


Wednesday, April 29, 2015

Spring has Sprung!


Hey everyone! Marla here with my final project for my guest spot. It's been awesome working with Gina's products as a guest designer!
For my project today I have a super cute Bird mobile to share. I just love how it turned out and hope you do too!
I have been seeing a few flowers growing and hearing some birds outside so that means spring is coming! I live in Connecticut, USA and we have long winters so spring is a welcomed time of year! 
I decided to use 'Mobile Birds' from Gina's store to create something inspired by the coming spring. The kit includes everything you need to create this awesome mobile!
First, I covered the top birdhouse part with paper and added some pretty trims and flowers. For the nest I used a beautiful handmade flower that I received from a friend. She also gifted me that pretty bird hanging above the nest.
The birds that came in the kit I decided to give a mixed media look to. I painted them with gesso then used a script stencil with modeling paste. After they dried, I used some Lindy's sprays in a few spring colors. 

 Check out Gina's store and pick up a mobile - with birds or butterflies! Happy spring!
Marla Rizzo

Tuesday, April 28, 2015

Pocket Letter/Mini Album Embellishments by Carla

I altered some pieces from the Say Cheese Shape Set to create these fun embellishments for my Pocket Letter and Mini Album. First, I wet the chipboard piece with VersaMark.
Next, I used three layers of some embossing powder from Lindy's Stamp Gang to create a pink frame with blue undertones.

 For this camera piece, I used Gold Stickles and applied it on the piece. The fine tip on the bottle made it s easy to fill in the fine details of the camera.

 Here is my Pocket Letter with the frames and camera pieces.
 And here are some pictures of a mini album I made using Stickles and Liquid Pearls to add some bling to the pages.


Products Used:
Lindy's Stamp Gang Cosmic Pink Blue
Gold/Silver/Pink Stickles
Baby Blue/White Opal Ranger Liquid Pearl 
VersaMark
Gold Sequins
American Crafts Dear Lizzy Serendipity paper 

Garden Fairy Pocket Letter

Hi everyone!! Amylove here to share a pocket letter with you! I am addicted to making pocket letters and Gina's laser cut pieces are perfect for them! I went with a fairy theme with this one and I love how it turned out!!


If you would like to see the techniques used to create this pocket letter please follow this link to the video tutorial:   Fairy Pocket Letter Tutorial

Here are the items used from Gina's Designs:

Other items used:
9 page pocket protector
Sprays
embossing powders
Glossy Accent
rhinestones
flowers
water color paper

Monday, April 27, 2015

Barb's Birds and Ivy

Hi Everyone! Barb here with a piece that I worked on while thinking of Earth Day. In celebration thereof, I decided to do a little up-cycling and use a couple of pages from an old lettering handbook that belonged to my Dad (a commercial artist back in the day when signs were painted by hand and not chunked together on a computer).
I began by putting the pages on a canvas panel with Mod Podge. After letting it dry overnight, I distressed it by using a wash of watered down white acrylic paint, sponged on inks, splattered paint and spritzed on sprays.
For the ivy frame I began with a bright green. I often go brighter and bolder on the initial paint because I know I'm going to abuse it into submission with lots of distressing. It's easy to subdue a color, but not as easy to make it brighter. Many have been the times when I've finished something and wish the color had a little more pop. Generally, the reason it doesn't is because I began it with a too subtle color.
Of course, once it was dry, I gave it all sorts of abuse. I sponged, stamped, splattered, wiped, sanded, splattered and sponged some more. I don't have a recipe for this stuff; I just play until it works for me. To bring out the color of the ivy I used StazOn Studio Glaze.
For the birdhouse and larger flying bird, I used Ranger Distress Crackle paints - Vintage Photo brown for the birdhouse and Clear Rock Candy for the bird (which I first primed with a coat of white gesso).
Once the crackle paints were completely dry, scrubbed on ink with a sponge and splattered and spritzed them as well.
Because I wanted the frame to be on top of the birdhouse and the smaller birds on branches, I used left over bits and pieces (the in between stuff) of Gina's Designs chipboard as spacers. See? More up-cycling! Plus, since it was the same material, the spacing was perfect. The frame is set apart and gives a nice shadow box effect to the whole piece.

Thanks for looking and happy crafting!

Gina's Designs Used

Other Items Used
Acrylic Paint
Ranger Distress Crackle Paint
irRESISTibles spray
Mod Podge
StazOn inks
StazOn Studio Glaze
Music rubber stamp manufacturer is unknown
9 x 12 canvas panel

Spring Cards and Tag

Hi there! Lynne here and it's finally really starting to look like spring in Southwestern Ontario. I'm celebrating the change in seasons with some spring-themed creations. 
The chipboard was dry-embossed, then heat embossed with a mixture of pearlized embossing powders. I then rubbed them with gold and bronze gelatos for warmer colours that coordinated with my papers.I love the texture and dimension the pieces get from the different embossing methods!

Thanks so much for stopping by and be sure to check out the great chipboard pieces in the Spring Shape Set. The pieces I used are just a few of the many items included!

 Gina's Designs Items Used

Other Items Used
Blue Fern Studios Ombre Dreams paper
Lindy's embossing powders
Gelatos
Prima stencils

Sunday, April 26, 2015

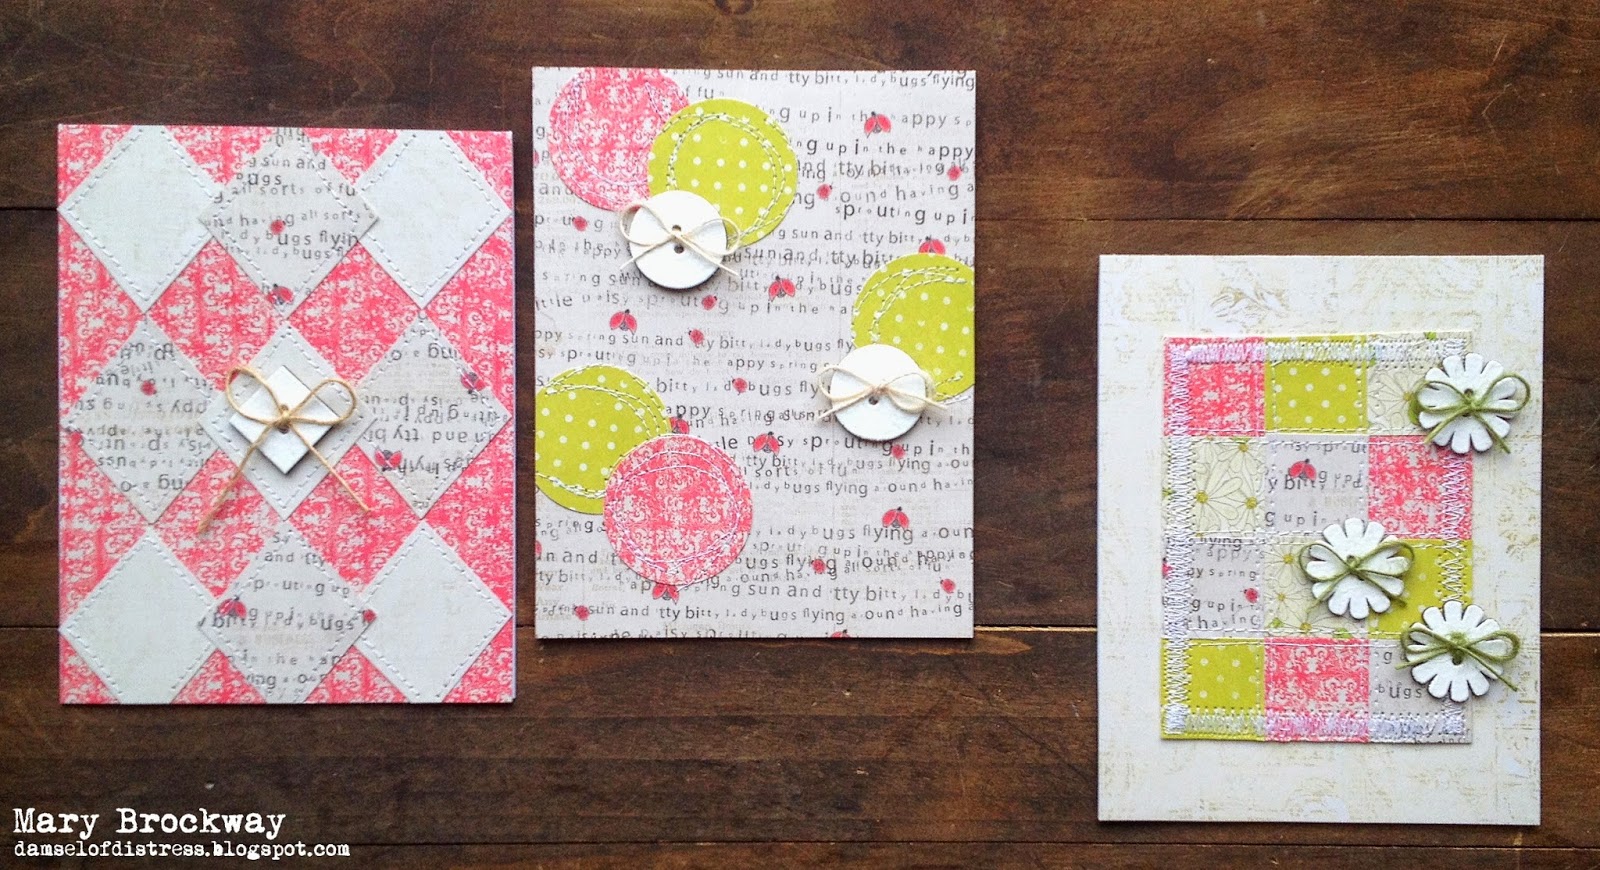
Quilted Cards with Mary B

Hello!  Mary here with a few quilt-inspired cards that are rocking some cute chip embellies.
I've always been a fan of the home-spun look of quilts, but haven't been able to make the jump to actual quilting.  So what's a girl to do when you're itching to make something stitched and fabulous?  Quilted cards, of course!

The Button Shape Set provides the perfect finishing touch for my mini quilts.

I've simply given them two coats of white embossing powder...

...and tied a bit of twine through.  It was as simple as ONE-TWO-THREE!!

Thanks so much for joining me today and I'll see ya next time!

Gina's Designs supplies used:

Other supplies used:
Iron Orchid Designs 6x6 Loolah paper pad
WOW  embossing powder in Opaque Bright White
May Arts String Burlap Ribbon in Natural, Ivory and Olive


Saturday, April 25, 2015

Shabby Chic Embellishments by Kim C.

Hello everyone!  This week I have created shabby-vintage embellishments!  These are so fun and so easy to make. I am so addicted to making these cute embellies!!!  So let me tell you what I have done!
I have used the Button Shape Set to make these super cute button embellishments.  The paper I used was in my stash. I glued the buttons to the paper then cut around the buttons. Victorian Velvet distress ink was used all around each button.  I then added trims and flowers to them.
For the next embellishments, I used the Dangles collection.  I also used a few pieces from Miniatures Ladies Choice to decorate them, along with flowers, trims, seam binding and pearls.  I also used a heart from Border Sticks Lattice Hearts.   The butterfly and mason jar where created with punches.  I punched out 4 of each and glued them together to stiffen them up.  I then added pattern paper and then decorated them.
 Please check out my blog to close ups of these super cute embellishments!

Gina's Designs Products used:

Other items used:
Flowers
Lace
Trim
Pearls
Paper from Kittys Scrap Post
Seam Binding
Victorian Velvet Distress Ink


Mermaid Cards

Hello everyone! Shanna here with a new share.
Summer seems to be trying to take over spring. So I thought why not create a little "summer fun" as I have been creating lots of "springy" projects lately.
When I was unsure of what to create when I thought, "Why not some cards." I was excited to create these awesome ocean style cards using Gina's fun shapes!

All the chipboard got a coat of gesso to prime the surface as I wasn't sure what I wanted to do with them yet. I chose to use a gelato on the sea shells for color and then gave a little coat of Art Anthology's Stone Effects called Sandstone to add more for texture for the sea shells.
The mermaids got edged around with some Vintage Photo Distress Ink. I loved their pop from the Prima papers so much I didn't want to add anything else to them.
I hope you found some summer inspiration. Keep coming back for more inspiration!

Gina's Designs Items Used:
Related Posts Plugin for WordPress, Blogger...