Showing posts with label Art Deco Corners. Show all posts

Saturday, October 10, 2015

Be True Canvas by Shanna

Hello and welcome to another day of inspiration. 


I wanted to go ahead and play with a canvas panel. I started with painting the wood with chalkboard paint. Then I went ahead and used some Primary Elements from ColourArte to go over some of the chalkboard. 


I covered the chipboard pieces with gesso. The leaves got colored with gelatos and some of the gold Primary Elements. 


The gears and the corners got some gold paint as well. I made sure to heat set the gears several times with several coats to create the textures. 


I love this sentiment and thought it to be great on the panel.


Thanks so much for stopping by today! Keep coming back daily for more inspiration!

Items Used:


Tuesday, August 26, 2014

Paris Themed Mini Album by Nancy and a Fall Themed Banner by Donna

Hi Crafty Friends!  Today we have two projects to share.  First up is Nancy with another August cross-promotional project featuring Gina's Designs with printable paper kits by Kitty's Scrap Post.


Hello Everyone!  Nancy here with another cross promotional project pairing Gina's Design's chipboard with digital papers from Kitty's Scrap Post.  This is my third project this month using the awesome papers in the Heartbreak kit.  Today I'm sharing a Paris themed mini album.  There are several more photos of this mini posted on my blog, and the link will be provided at the end of the post.


Above:  The cover was created using fussy cut images from the Heart Break digital paper kit and a Gina's Designs Texture Sheet in Diamond Pattern, deco corners, and the word "Love" from the 10 words set.


Above:  Background papers and images are from the digital paper kit.  Photo book tucked inside pocket featuring a chipboard cameo by Gina's Designs embossed in shabby aged silver.  The page on the right is a split page, with the top half featuring a flip up.

Above:  A flip-up page featuring sentiment,  corset and mirror by Gina's Designs.  Perfume bottle is fussy cut from the digital papers, and also background paper is from the collection.  All design elements are unattached in the photo mat area, so a photo can be slipped onto the mat.


Above:  Gina's Designs chair and dressform, the perfume bottle, image of lady and background paper are from the digital paper collection.   All design elements are unattached in the photo mat area, so a photo can be slipped onto the mat.


Above:  Another cameo from Gina's Designs placed on an image fussy cut from the collection
  Feathery Flourishes surround the fabric flower.


Above:  The image opens up to display more gorgeous images from the collection.


Above:  More images from the collection and a chipboard Fleur de lis and Paris elements from Gina's Designs.


Above:  A flip page featuring papers from the collection (you can see the inside of this page and more on my blog) and Eiffel Tower by Gina's Designs.  On the adjoining page I have a side pocket featuring doilies from Gina's Designs in black, and also a silhouette lady has been script stamped. 


More gorgeous images from the collection on this flip out page, and below is the final page, with tag removed to reveal a transparency with an image from the collection slipped inside which could be replaced with a photo.


This mini album was so much fun to create.  Lots more photos on my blog HERE.

Gina's Designs Products used:


Digital Design Papers by Kitty's Scrap Post

Other:
Dark Red Latex Roses and White Pearl Trim by Craftsupplies1
White Feather Flower on cover by Tresors deLuxe


Next up is Donna with one of our new products for Fall.  This banner looks amazing paired with Graphic 45 papers!


Hi, it's Donna here today to share a Fall Banner I made with Gina's Designs Fall Banner Kit!


The chipboard kit comes with two types of leaves, and two cute rakes! 


I have to confess...I am addicted to making the cute 1 inch chipboard charms (punch elements)! I was so excited to see the 1 inch round designs in the paper collection! 


Gina's Designs


Other Products

Graphic 45 An Eerie Tale Collection papers and embellishments
Shabby lace and butterfly - Little Scrap Shop/Etsy
1 inch punch
Embossing powder

Thank you for stopping by Gina's today! 


Wednesday, July 23, 2014

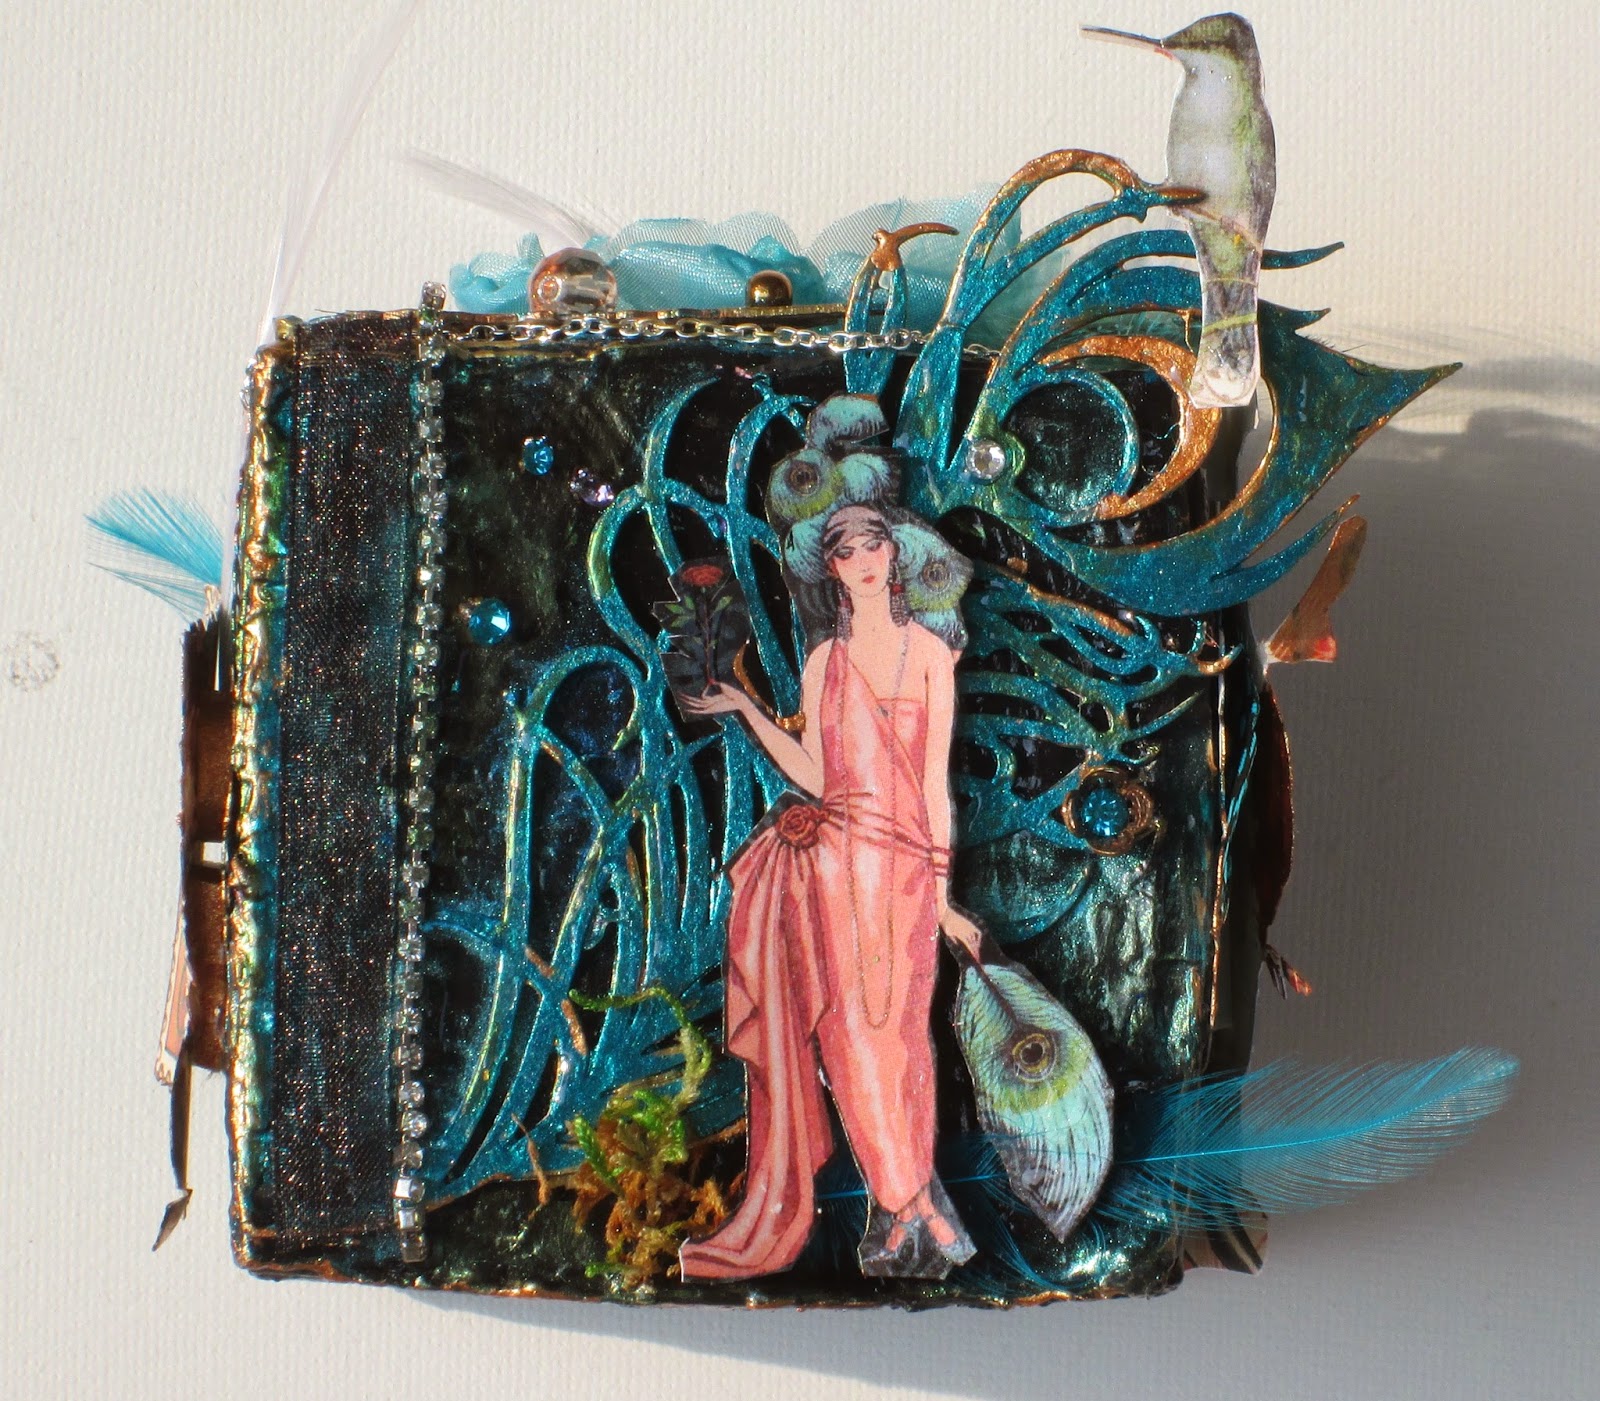
Artist Trading Block in Turquoise and Black

Hi everyone! Melissa here with my take on our artist trading block.  

I painted my block with white gesso, then black acrylic, then a coat of glossy accents.

  I felt that the chipboard and doilies I put on the block perfectly complemented the theme, and era of the images.

I painted all the chipboard with gesso, then turquoise Viva Color Precious Metal Effects. I didn't need gesso on the doilies,and I also painted them in turquoise. On some chipboard I added a little bronze paint,  stickles, green Lumieres, and/or diamond glaze coating.  I embellished my block with images, bling, metal, feathers, beads, moss, pearls, and lace.

Thanks for looking!


Chipboard used:


Other products used:
Folk Art black acrylic paint
Viva Color Precious Metal Effect Paint in turquoise, and bronze
Jaquard Lumieres in green
black ink
Graphic 45 papers: Couture Collection and Botanical Tea Collection
Tim Holtz metal
Judy Kins Diamond Glaze
Glossy Accents
Jolee's Bling
Ranger Liquid Pearls
Jaquard Mica powder
Feathers, seed beads, bling , flower, and chain from my stash


Thursday, May 15, 2014

12 x 12 Mixed Media Layout by Melissa and custom Wall Decor by Deann

Hi! it's Melissa here with a layout I created with Gina's Designs Lasercuts.

For this layout, I used texture paste on one of our borders, using it as a stencil, then I painted it with gesso, followed by acrylic paint and lumieres.

I also put a layer of gesso followed by acrylic paint on the chipboard pieces.

I scrapped a photo of  Evelyn Nesbit, a famous model and actress from the early part of the 20th century, who has an interesting history.

Thanks for looking!


Chipboard used:

Other products used:
Prima Printery paper
Bo Bunny paper
Prima flowers
Tim Holtz metal corner


Good morning Crafty People, Deann here with a very cool project from Gina. Did you know that you can make special orders? Well you can! Here is a project that I made for my craft room using a very big Eiffel Tower. The measurements of the Tower are 25 inches tall and the bottom of the Tower is about 14 inches wide. It's very big and very awesome ! Any item in the store can be special ordered in different sizes.
I also used one of Gina's Doily Set 8 inch cut in half and two Paris labels. 

 Lots of flowers and leaves. Two ribbons were used on the bottom of the canvas and some brass studs.
 Wood letters that spell Paris were painted green and black.

I painted the Eiffel Tower tan. When that dried I added Crackle Medium and let it dry. I then painted over the crackle medium with a bronze brown paint
Thanks for stopping by!
(((HUGS))) Deann

Gina's Designs products used:

Eiffel Tower-Special order size
Doily Set 8 inch  color-Ivory

other products used:
Flowers from Craftsupplies1
Paris Labels from Kitty'sScrapPost
12 x 24 inch burlap stretched canvas
misalliances- ribbons and brass studs


Wood letters 

Friday, April 25, 2014

Family Photo Cube by Kim

Hi everyone and happy Friday! For me weekends are all about family, so today I would like to share with you my Family Photo Cube I have created featuring photos of my Grandson Brayden.  I used some of the Prima Cartographer paper on this cube, and there are lots of images of hot air balloons on the paper, so it worked out great with Gina's Net Style Hot Air Balloons which I have used on the top of the cube.  I also used some of the Border & Corner Gear Miniatures along the side of the balloon, and a wooden sentiment from my stash that says Our Family.
Above here you can also see the photo on the front and I have used some of the Art Deco Corners, embossed in black, for photo corners. I finished it off with some flowers and a metal zipper.

 Below here you can see some photos of my beautiful Grandson Brayden.  I have placed his photo inside some of the new Word Frames.  The first one says "moment", and on the opposite side of the cube, I have one which says "family". I used another of the Border & Corner Gear Miniatures, a metal arrow and flower in the corner of the frame. I wanted to keep it simple, to make the photo the star of the show.
 

Here is the reverse side of the photo cube. You can see I have used one of the new Photo Reels, embossed it in black, and then used a metal flower on top of it. I then used one of the words from the Word and Phrases set "love", and topped it off with another flower. Below the back of the hot air balloon, I used a metal butterfly and cameo. On the base you can see I placed a vintage doily, some more flowers and some of Gina's Feathery Flourishes to complete the look. 


 Below here is a close up of the Deco corners, they make perfect photo corners for projects, I just love how they turned out and they hold the photo perfectly!
I hope you will try making your own family photo cube, this was a lot of fun to create!
Thanks for stopping by today.

Gina's Designs Products Used

Other Items Used
Prima Cartographer Paper
Metal Cherub, Flower & Butterfly from Craftsupplies1
Wild Orchid Craft Flowers
Stampendous Aged Taupe, Shabby White Embossing Powder
Ranger Fine Black Embossing Powder
Fabscraps Metal Zippers
Wooden Sentiment from my Stash


Related Posts Plugin for WordPress, Blogger...